Tuesday, December 4, 2018

My Deer and Doe Melilot

This pattern (the Deer and Doe Melilot) and I went on a long fitting journey. I honestly don't even remember when it started, but it took me four muslin fittings and quite a few months to get it finished. I can see from my photo roll that I purchased this African Wax print at Golden D'or in Dallas back in April. It took me a while to settle on this pattern for it though.
  Melilot button down

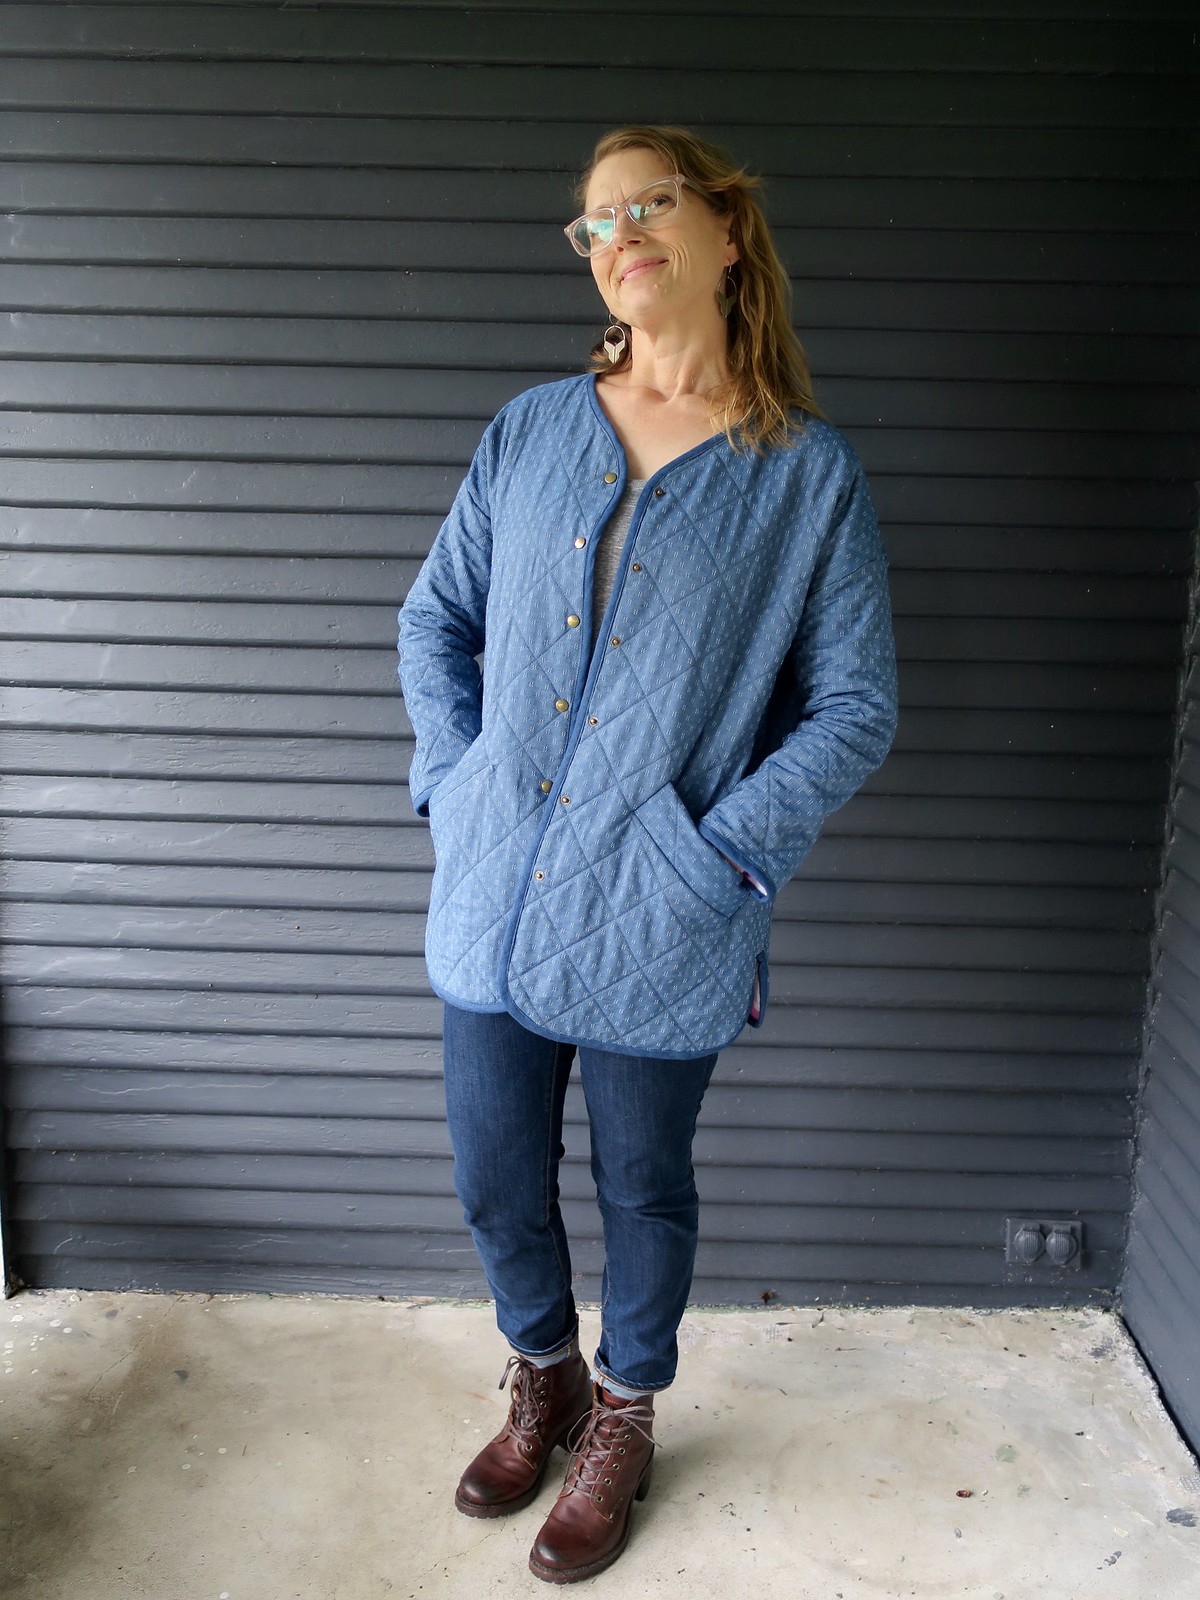
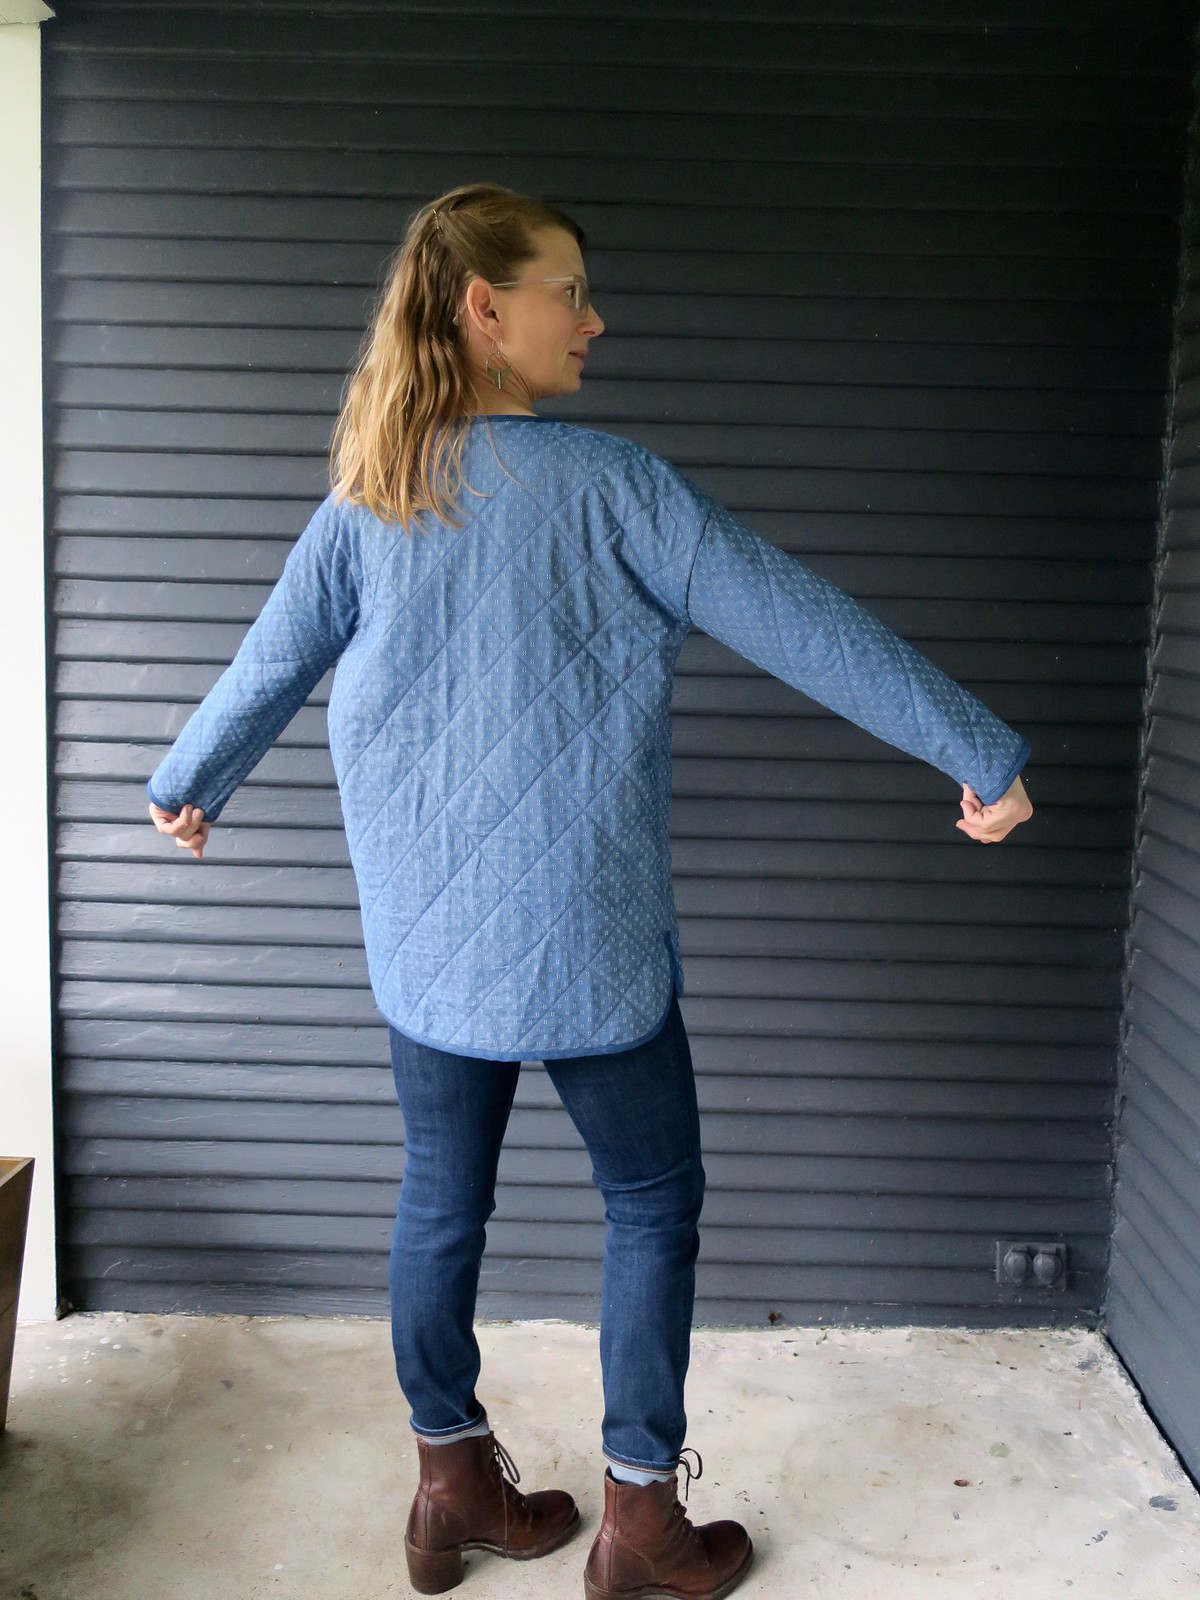
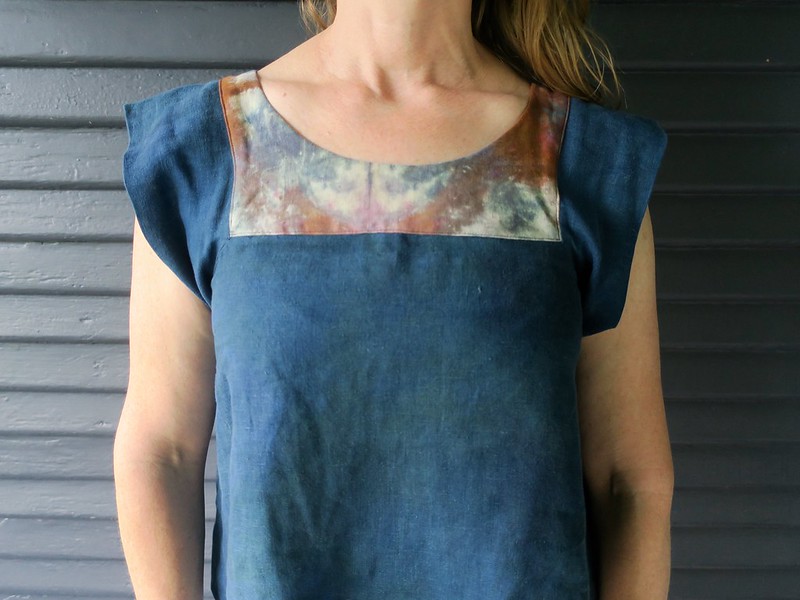
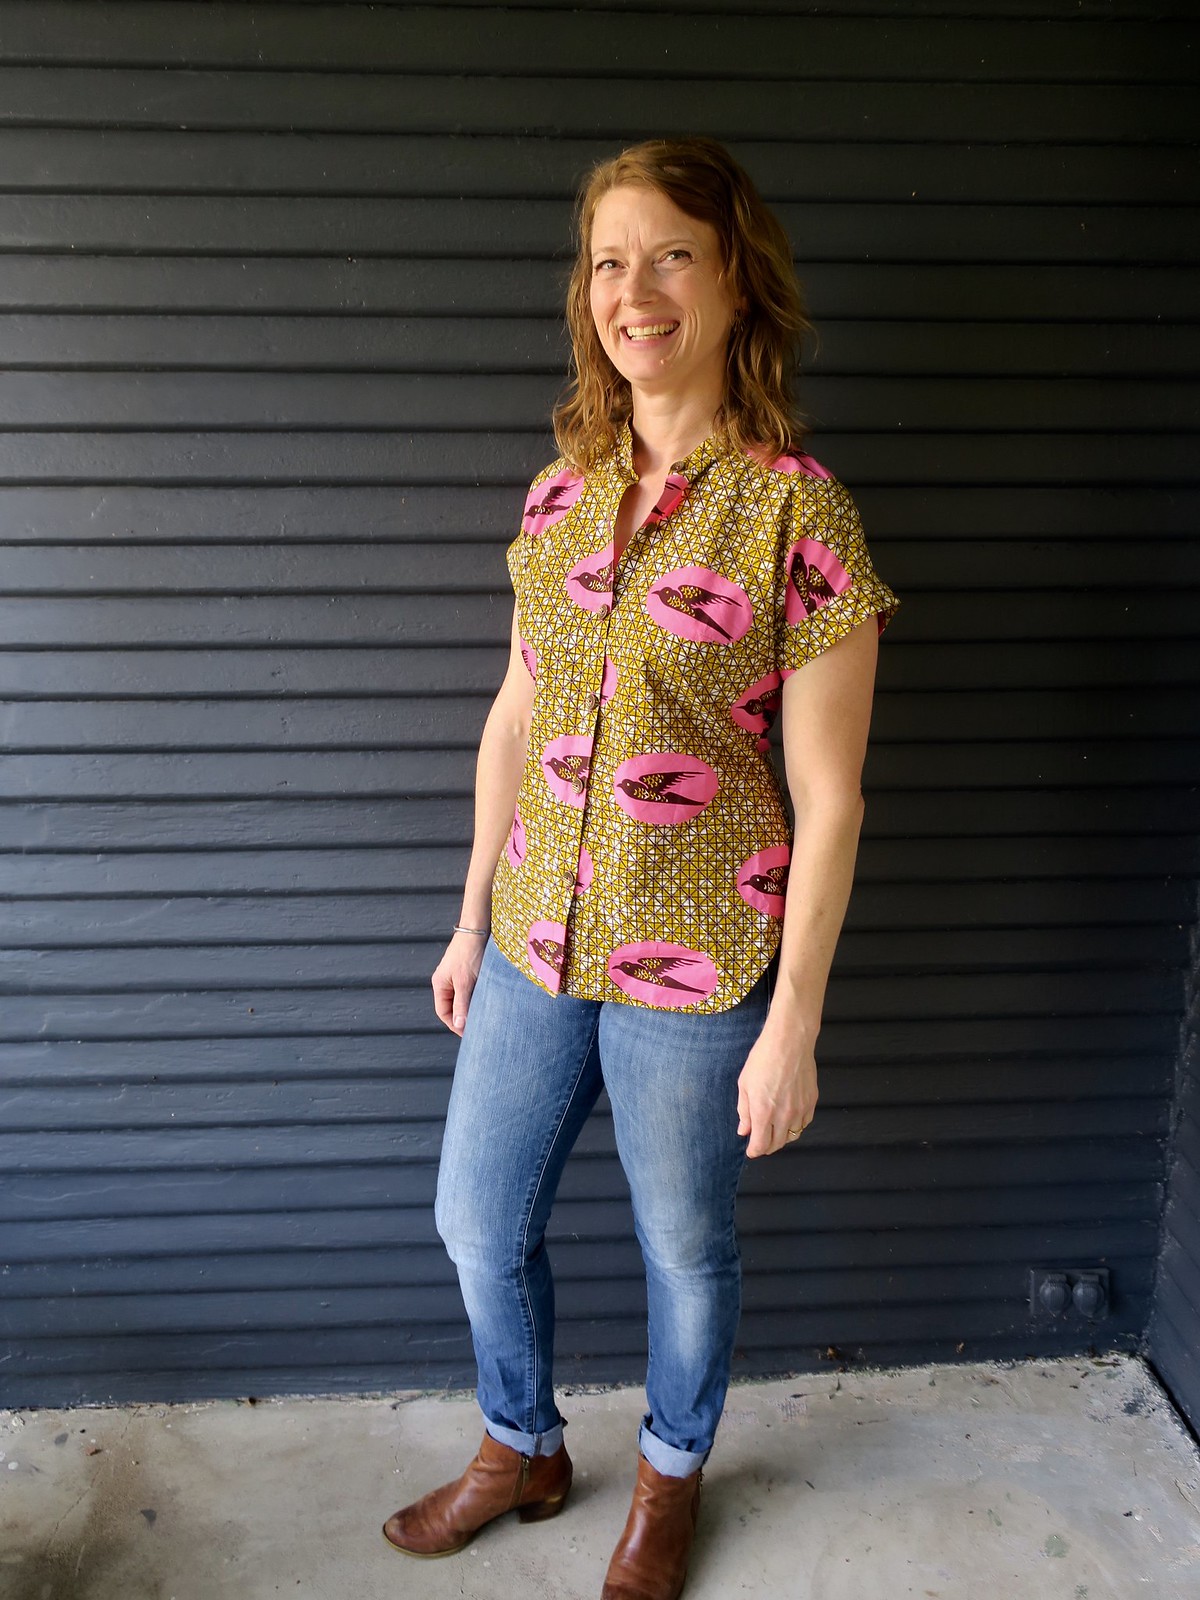
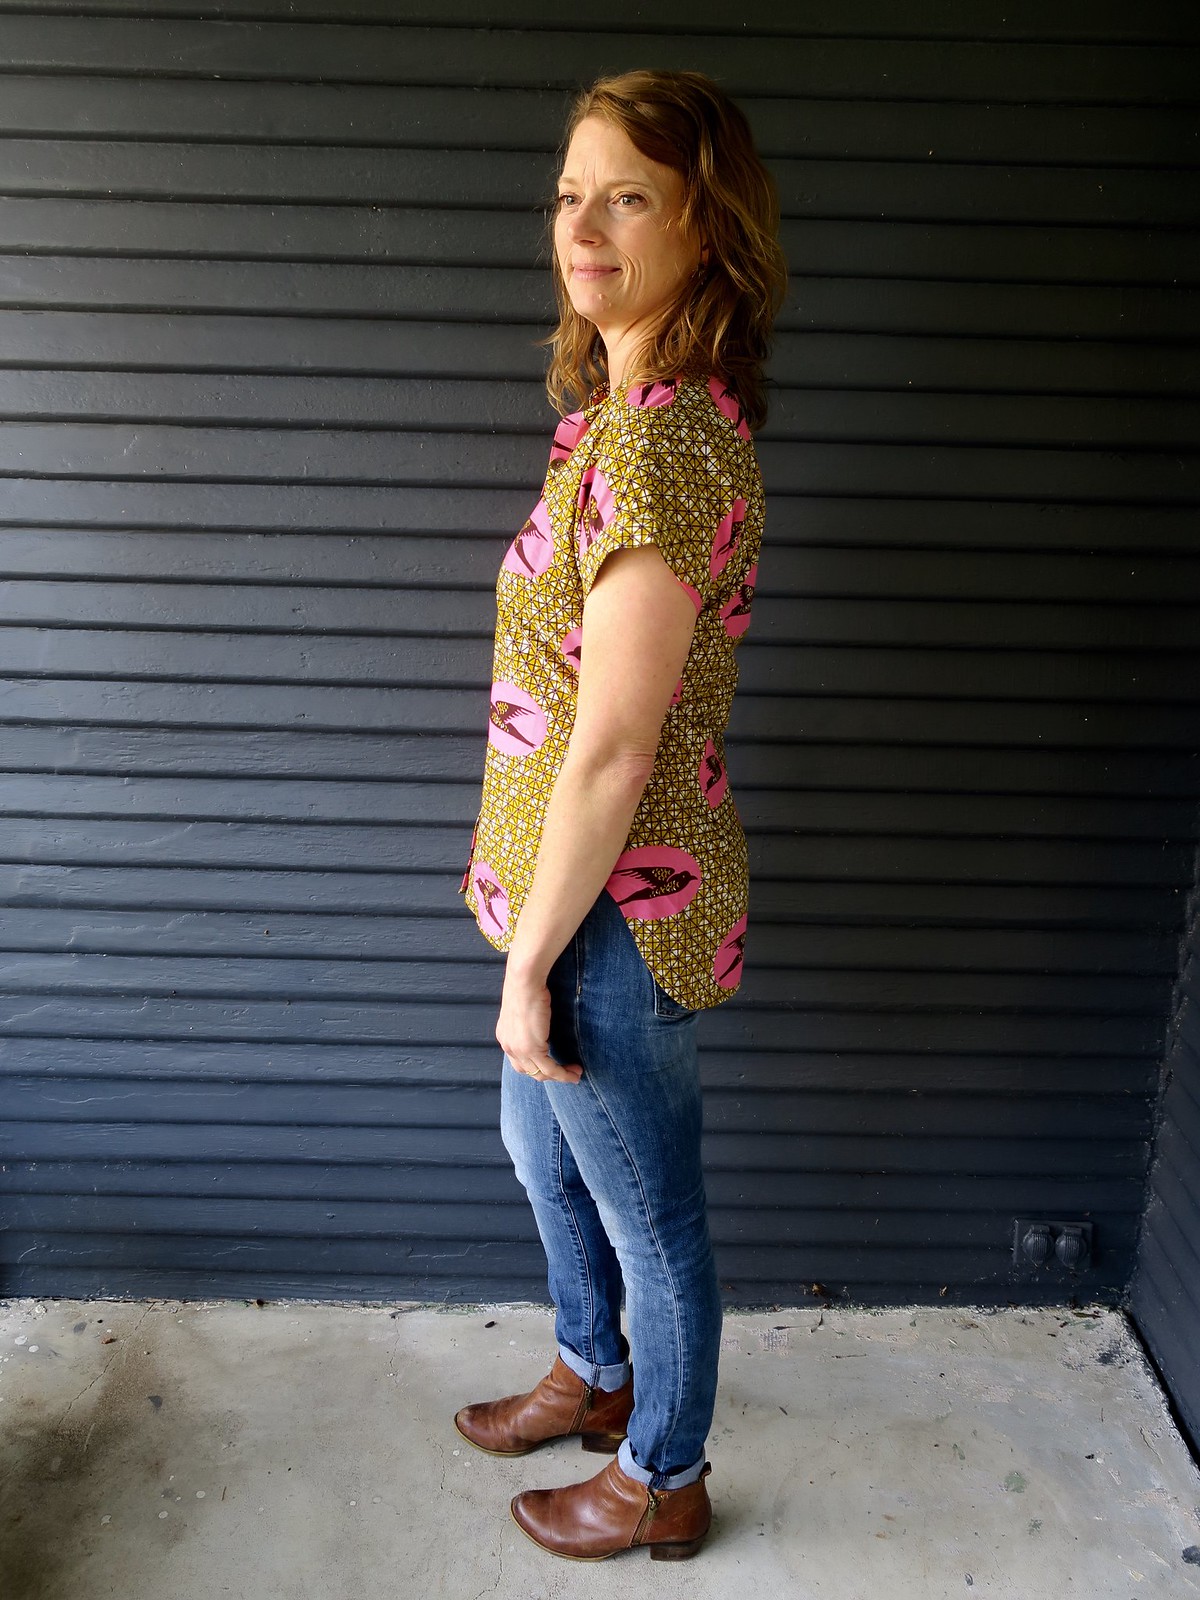
I am so glad that I persevered because I just love this shirt, the fit is great and I am already making another version with long sleeves.

Melilot button down

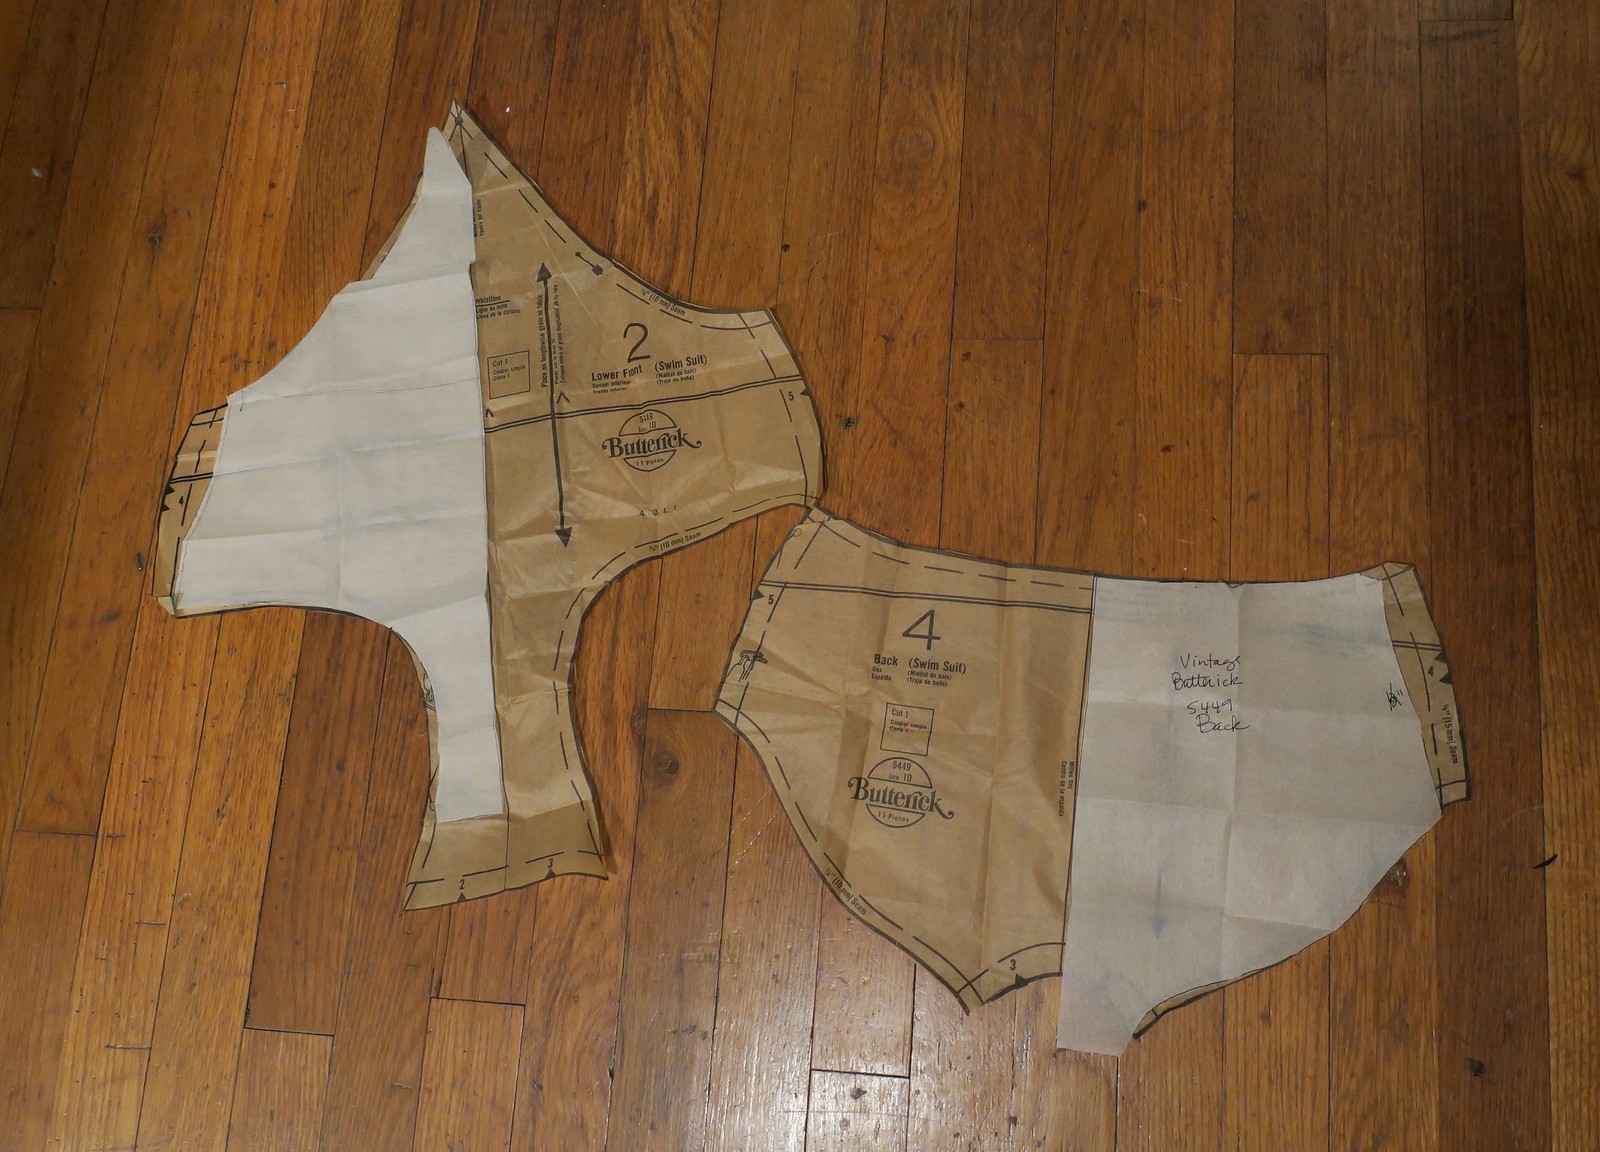
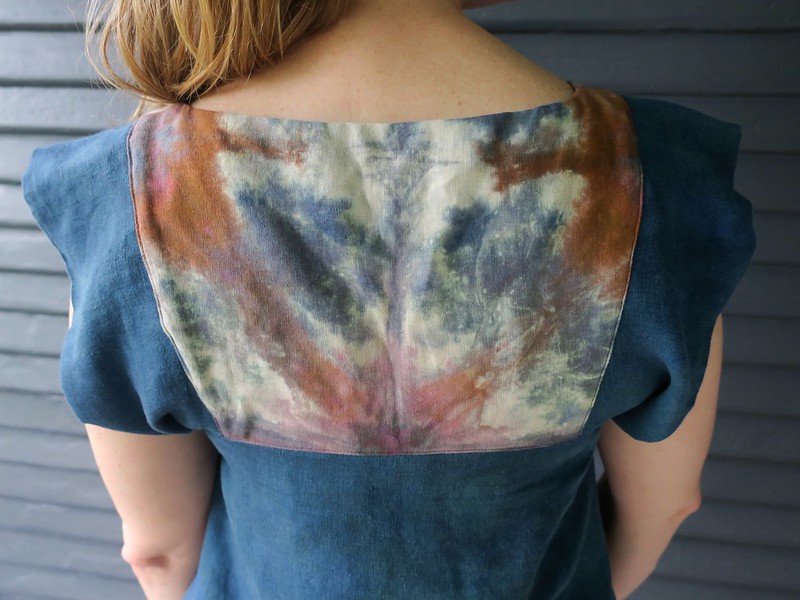
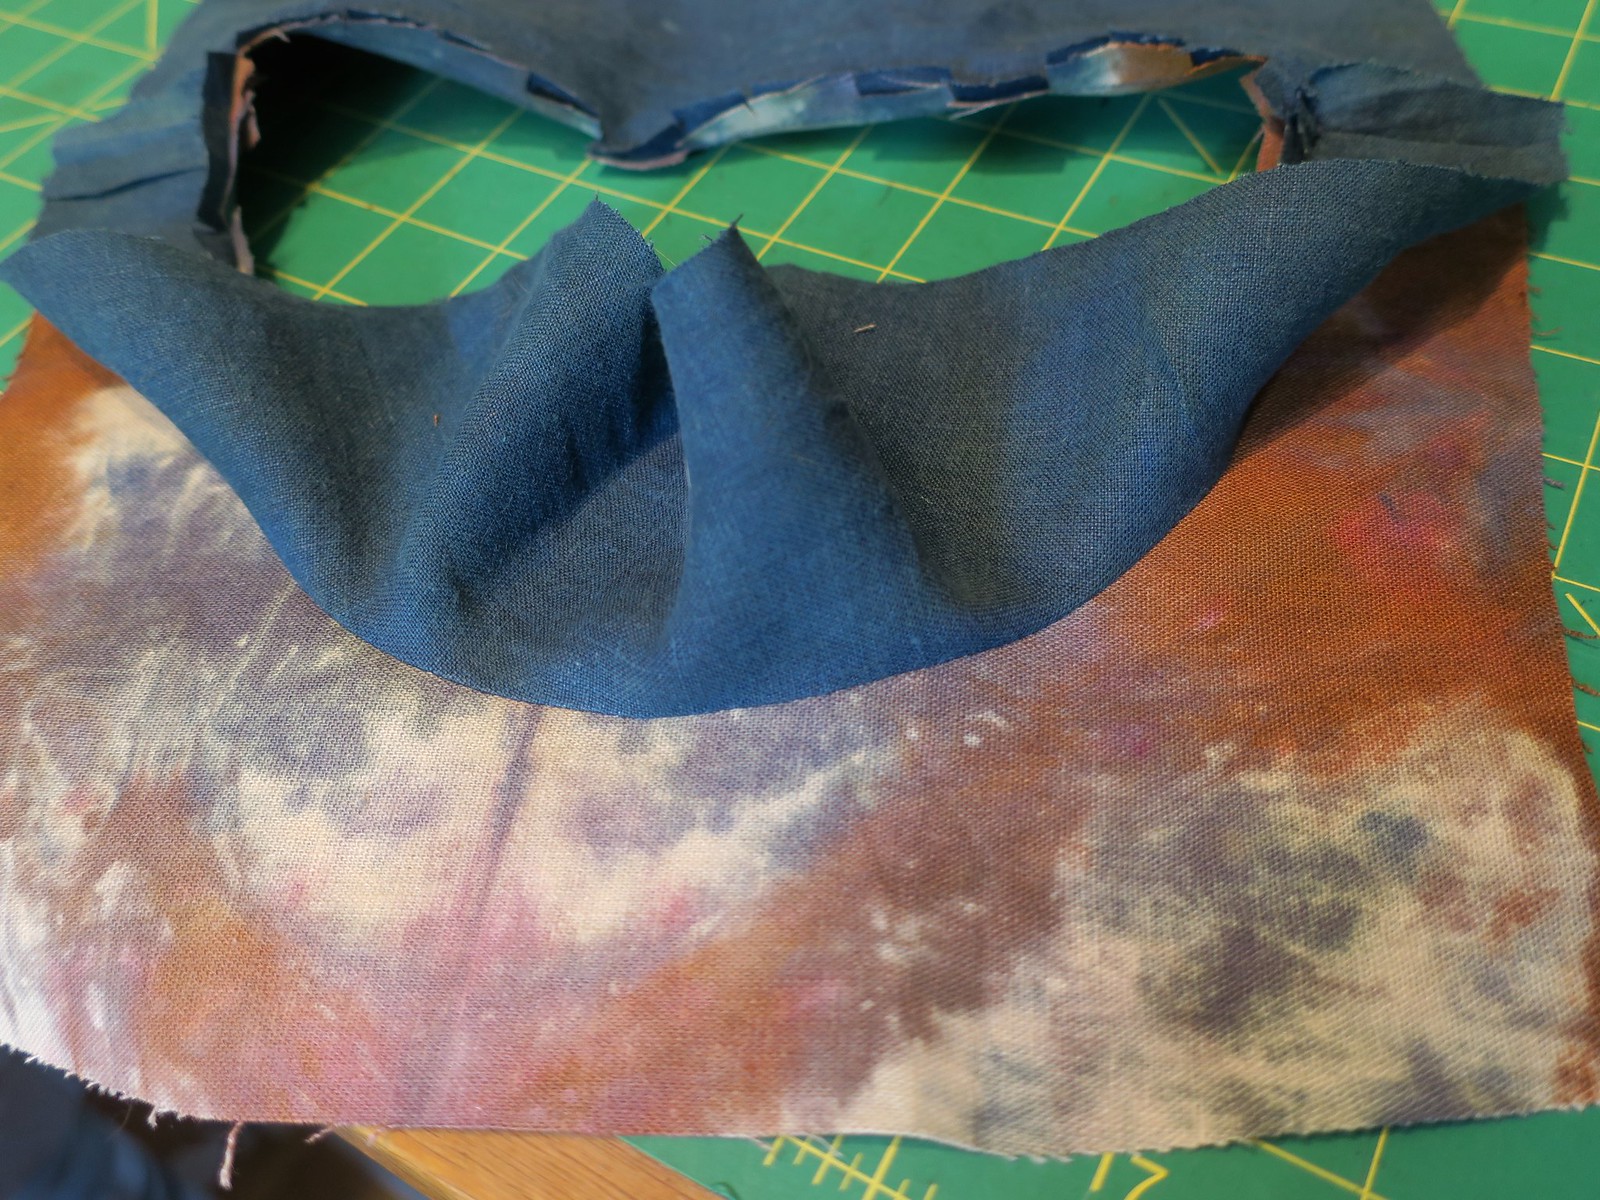
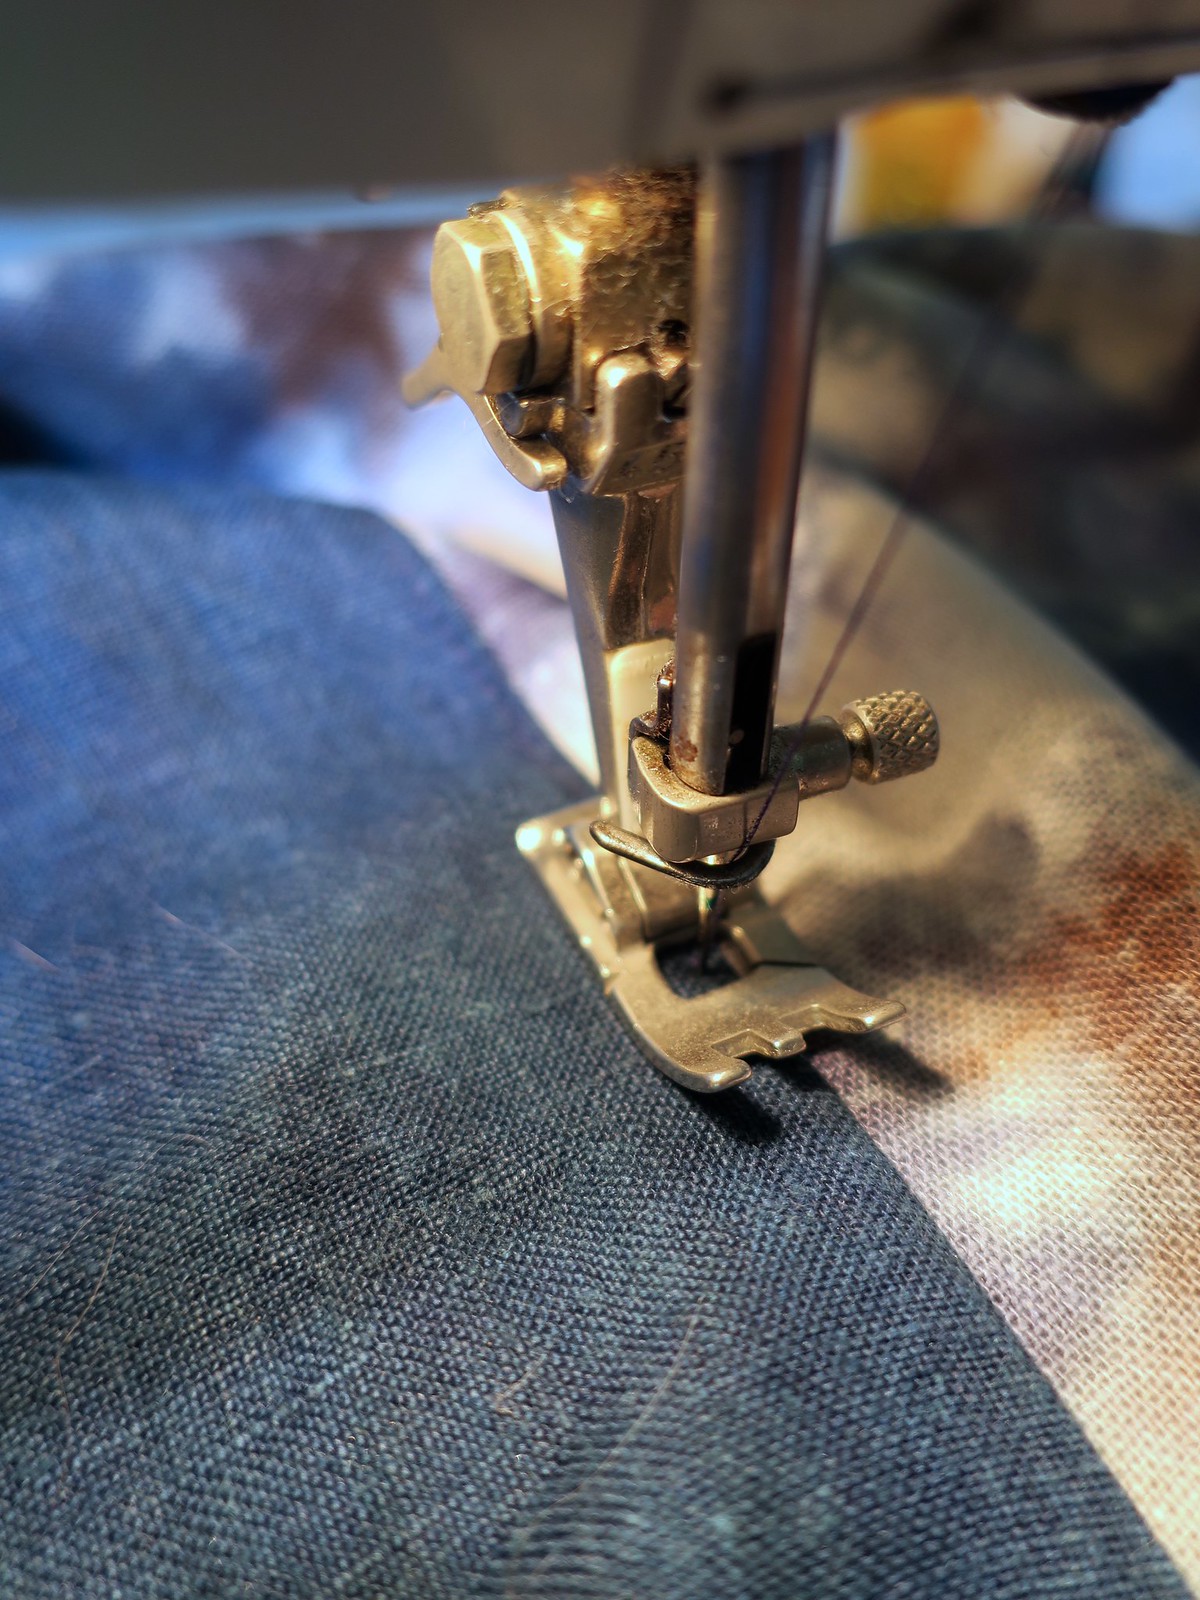
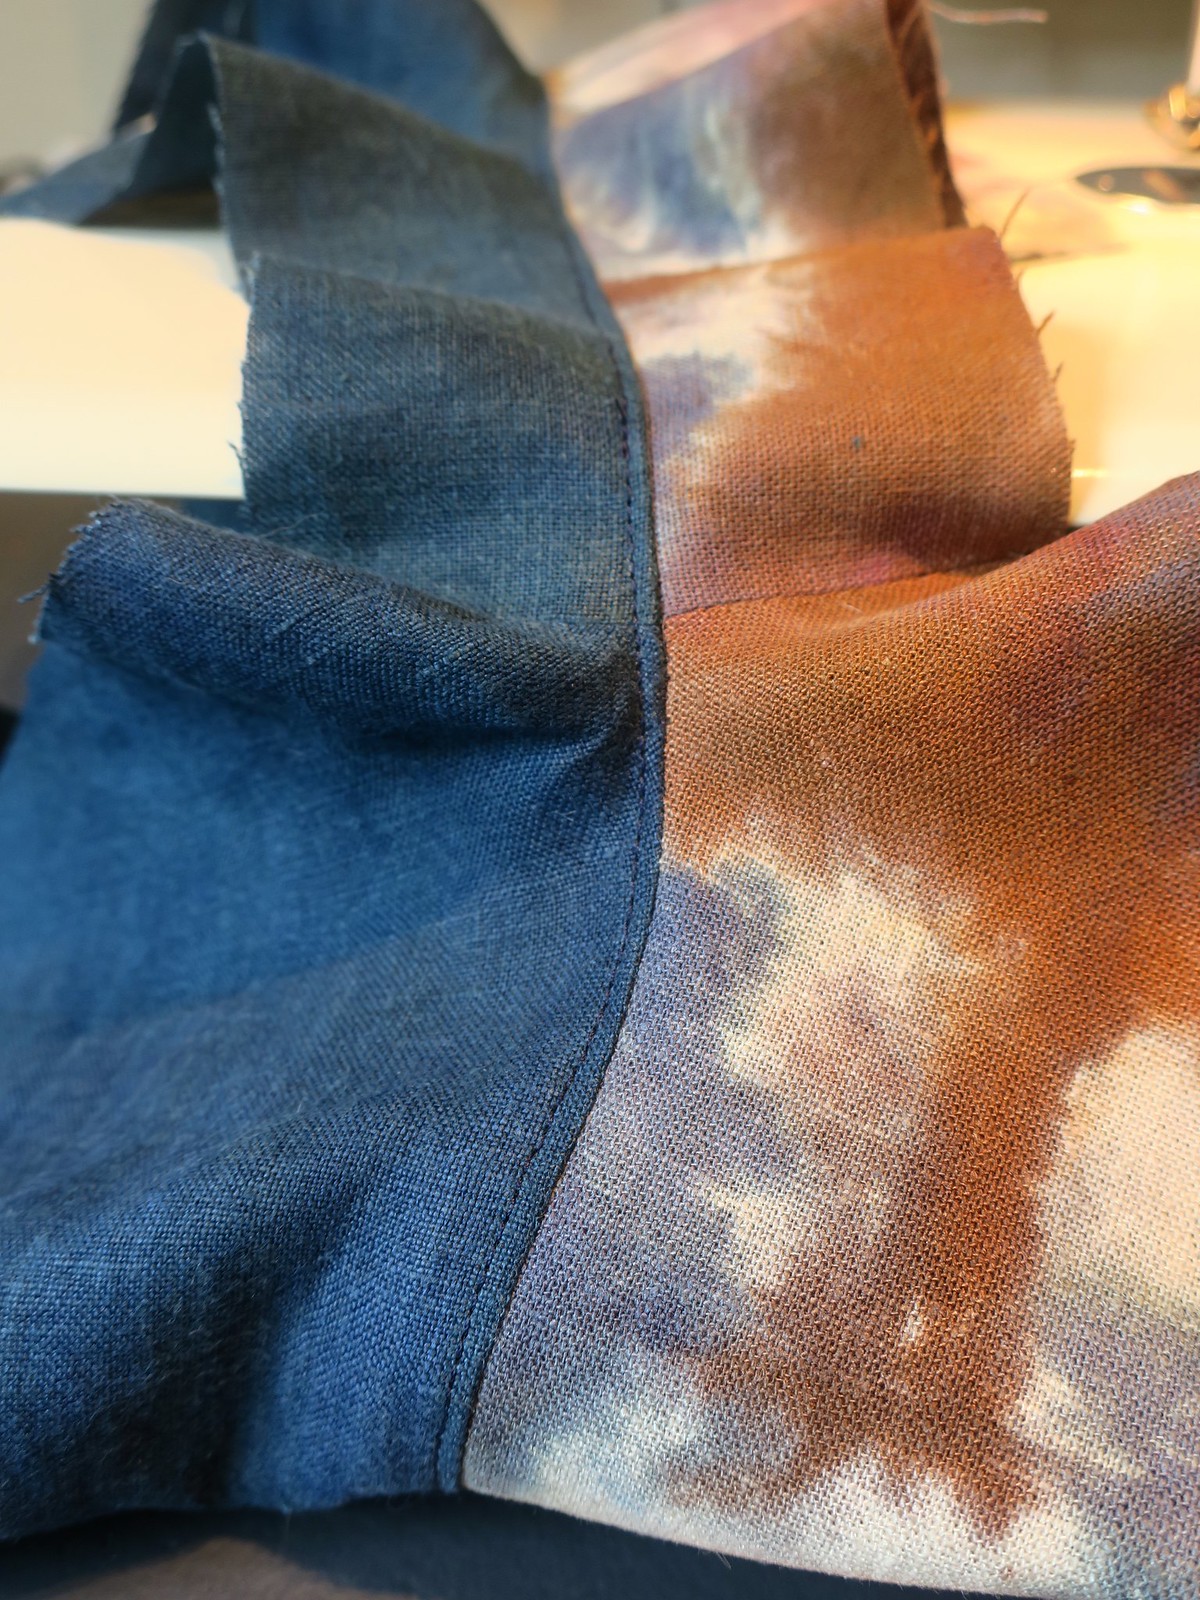
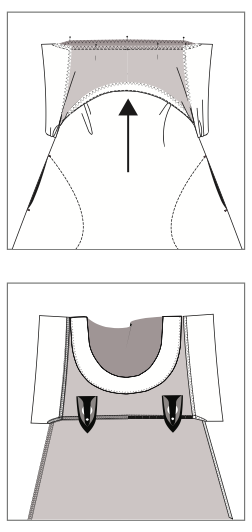
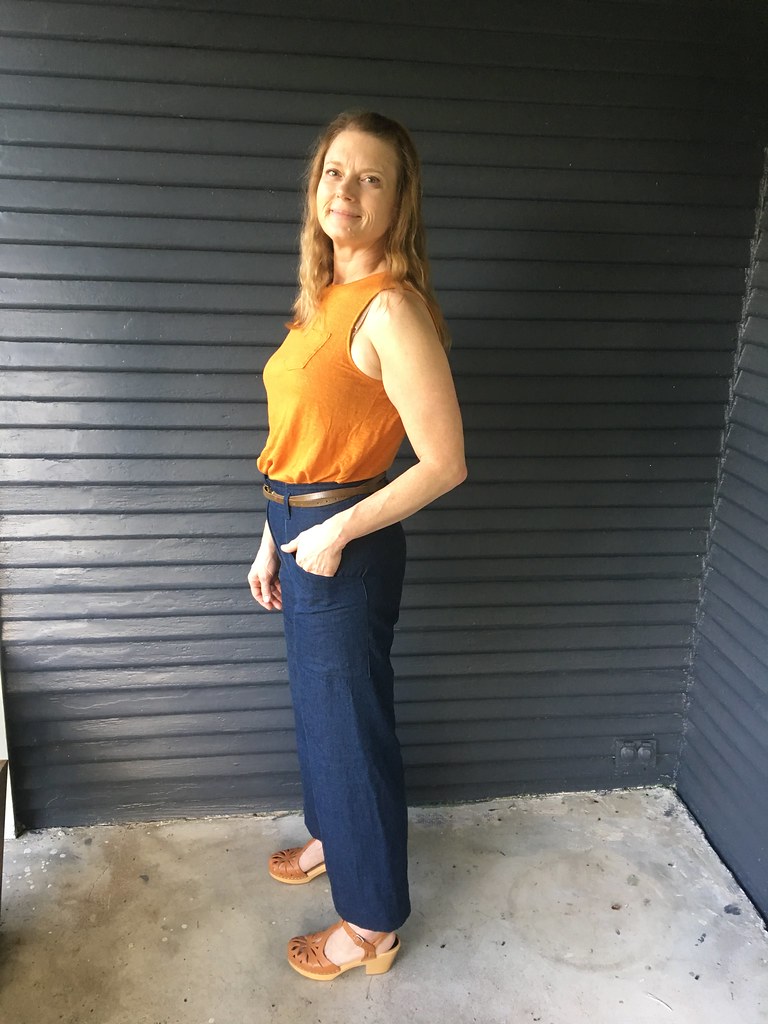
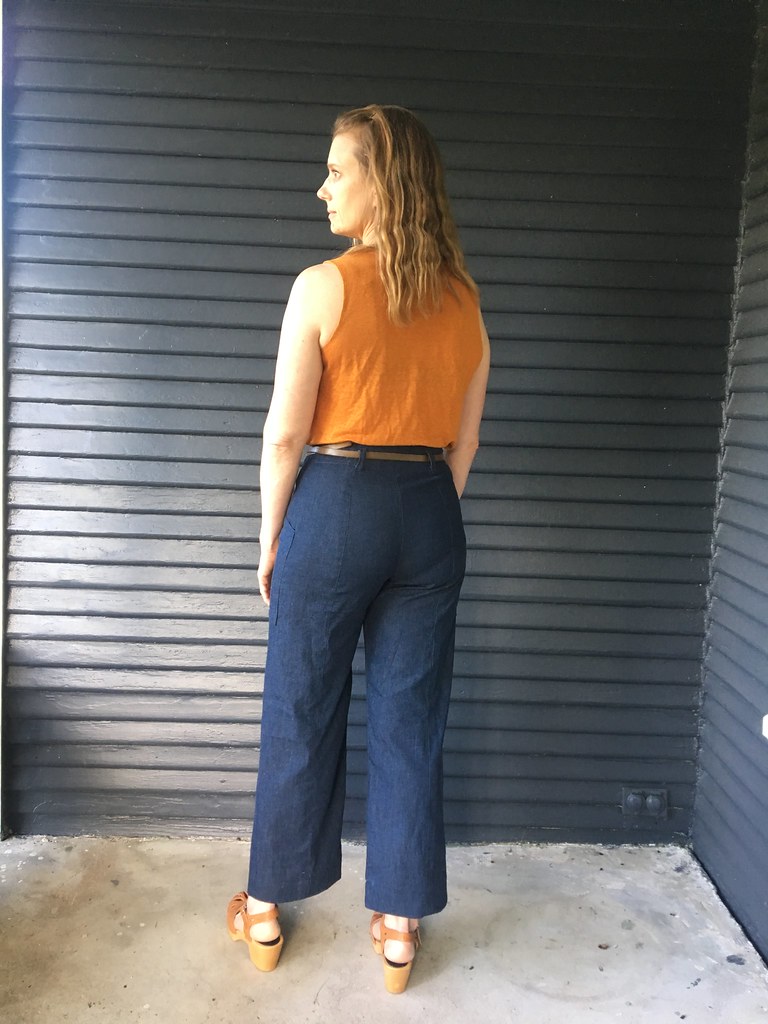
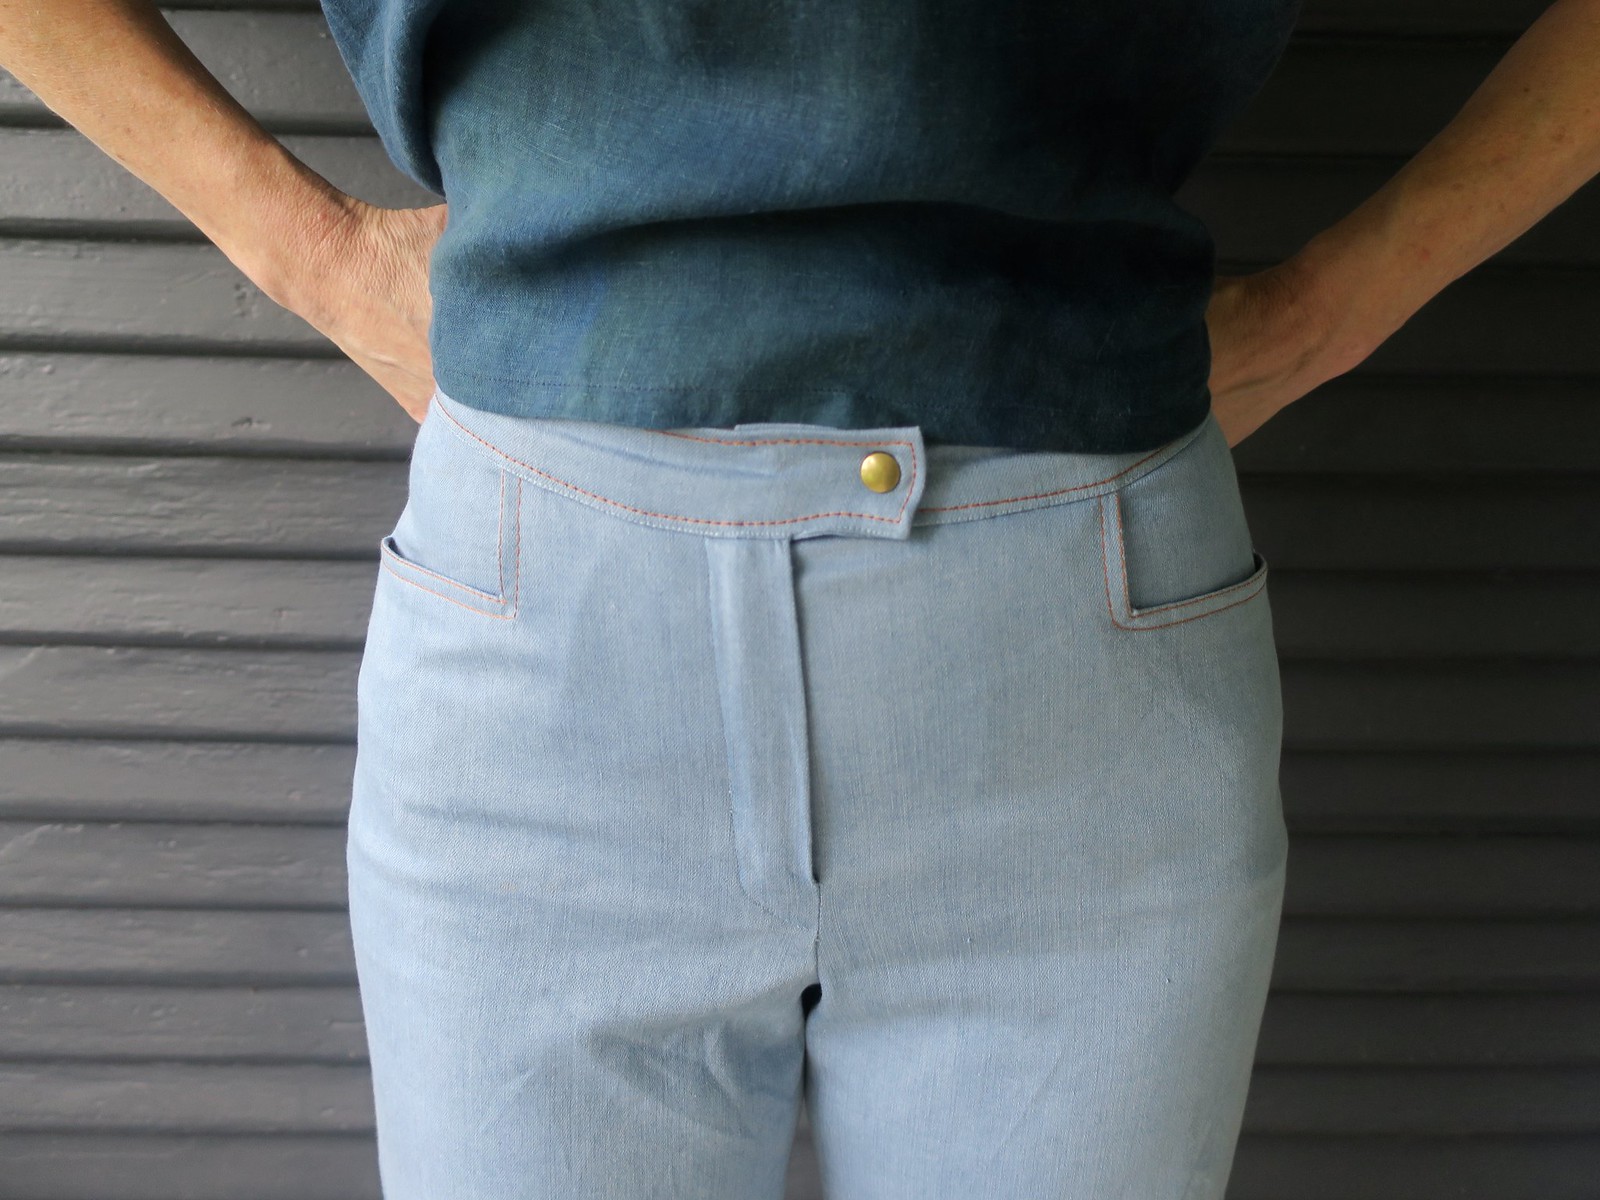
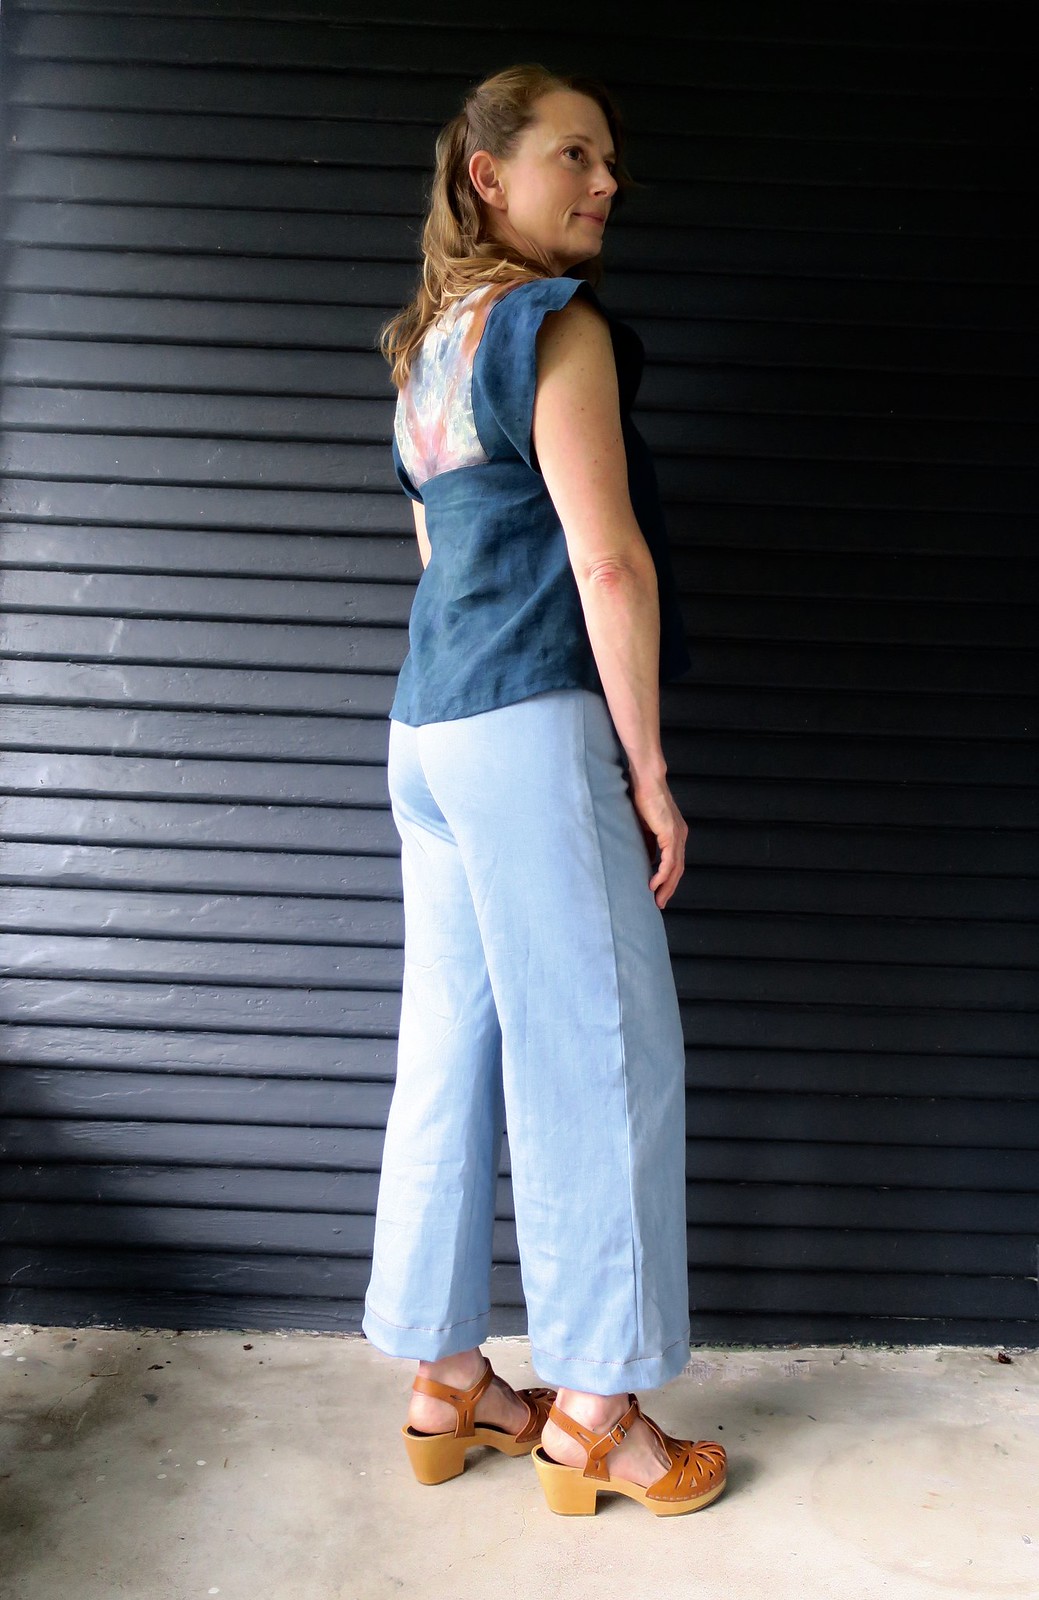
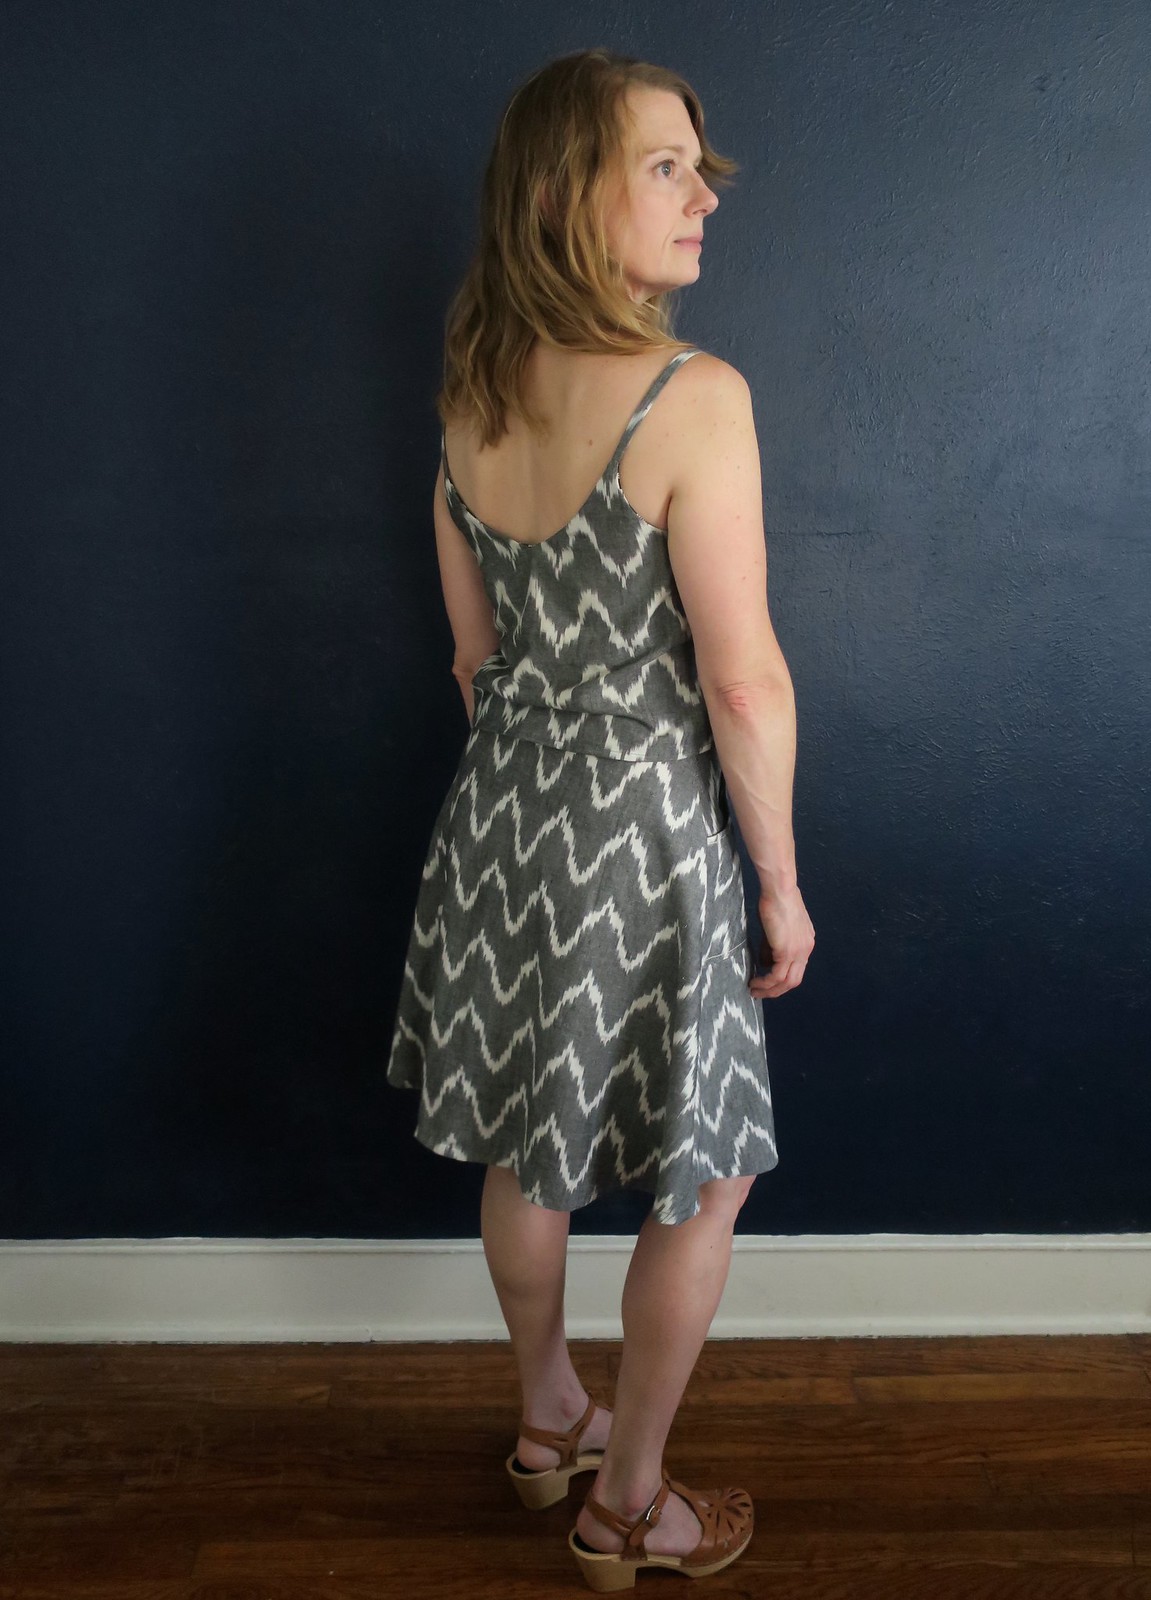
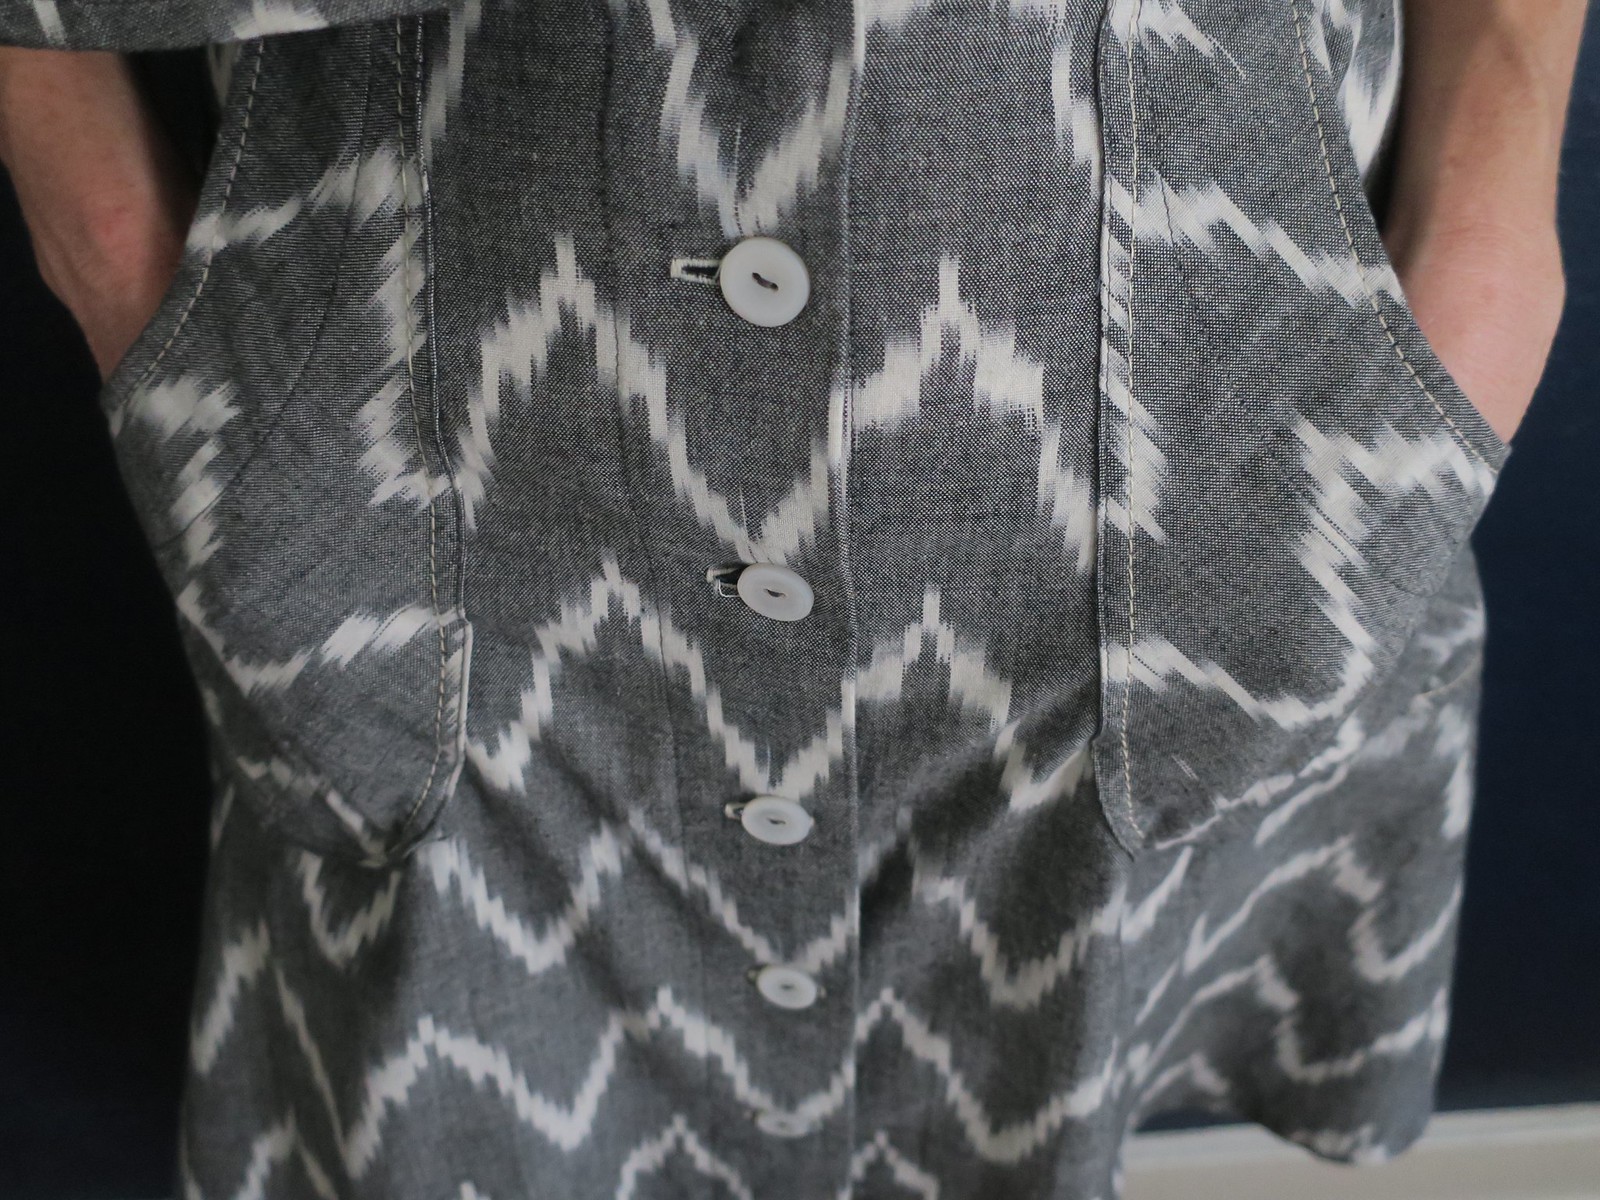
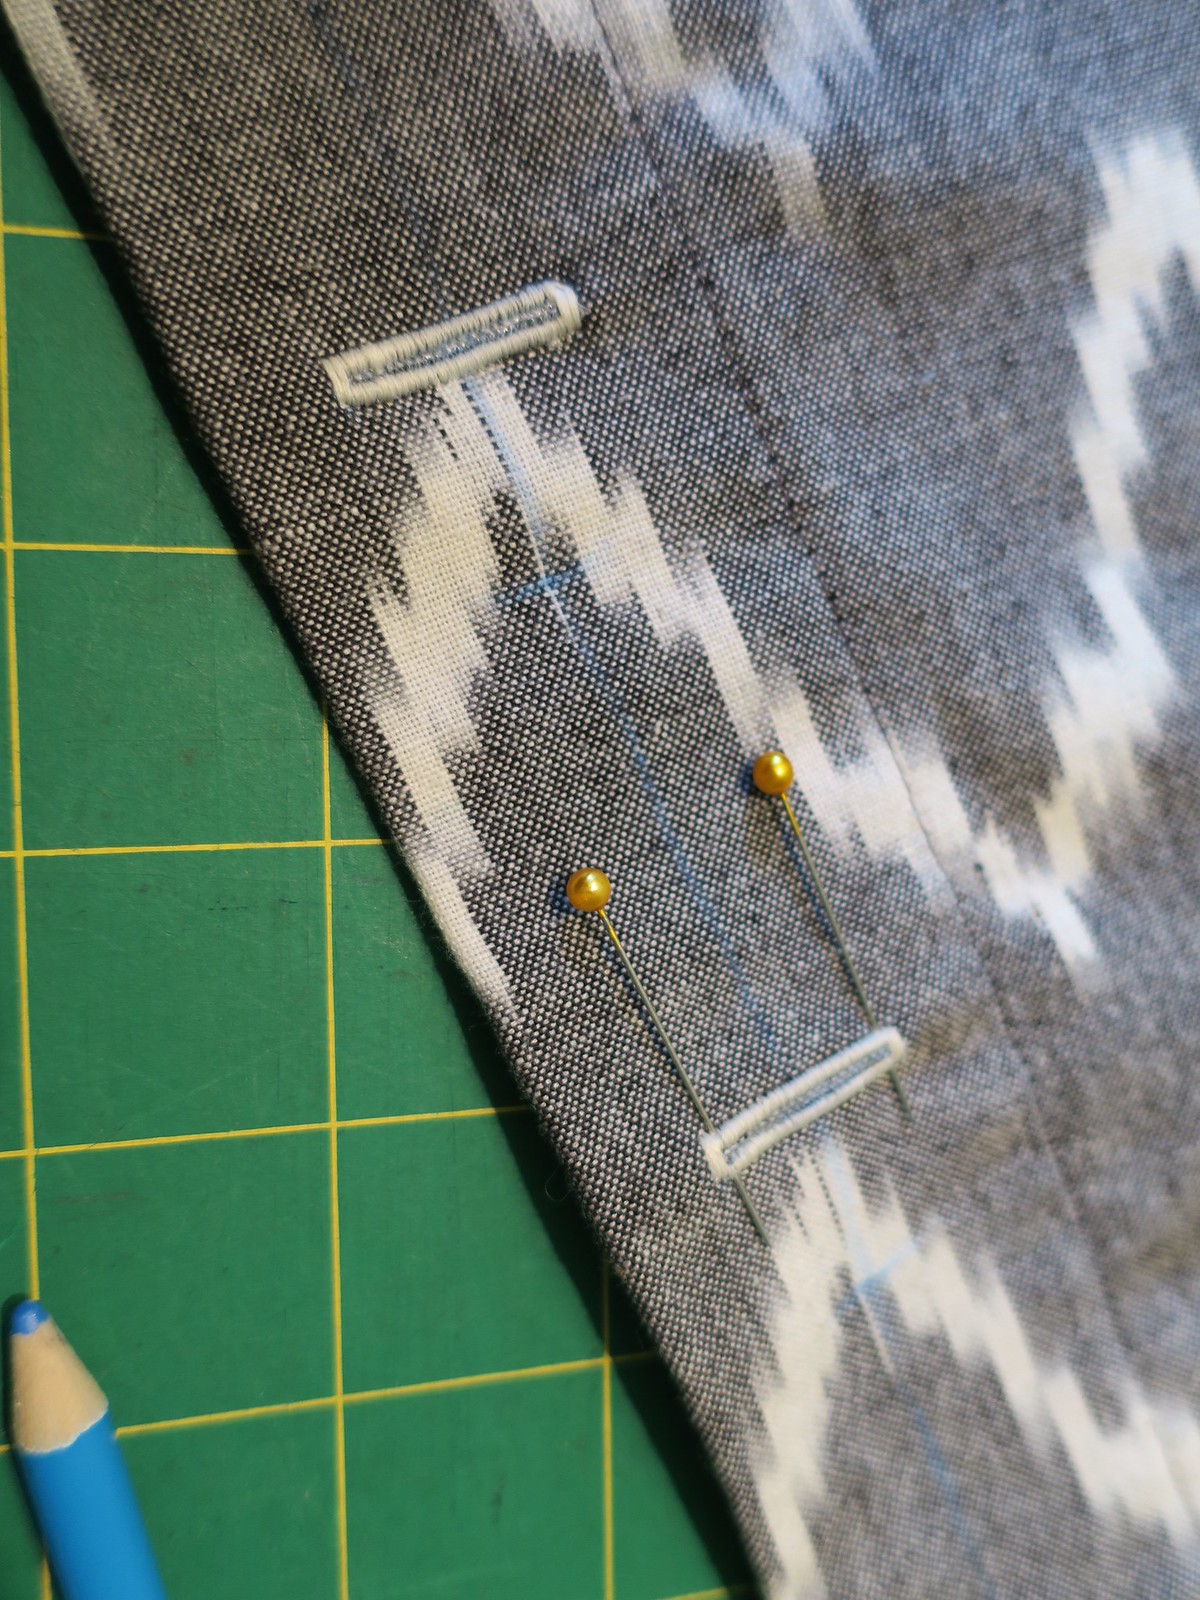
I had a major sway back to fix with the original draft of this pattern. For my first muslin I tried doing the alteration that I used in my Colette Aster. You can see the details of that adjustment here. It didn't work. I had come up with the idea to use fish eye darts in the back to assist with fitting. They had worked so well with my McCalls 6649 button-down. For my second muslin I went back to the original back pattern piece and only added the darts, that wasn't enough. So for my third take I took a wedge out of the center back by slashing through the waistline and pivoting the pattern piece. This took some length off the side seam in the back but more importantly added ease through the hips and butt. THEN I added in those lovely fish eye darts that I borrowed from McCalls 6649 and voila, the fit is great. I'm still not sure I'm doing any of these adjustments "properly" but I'm doing what works for my body and its the best I've figured out so far.

Melilot button down

Melilot button down

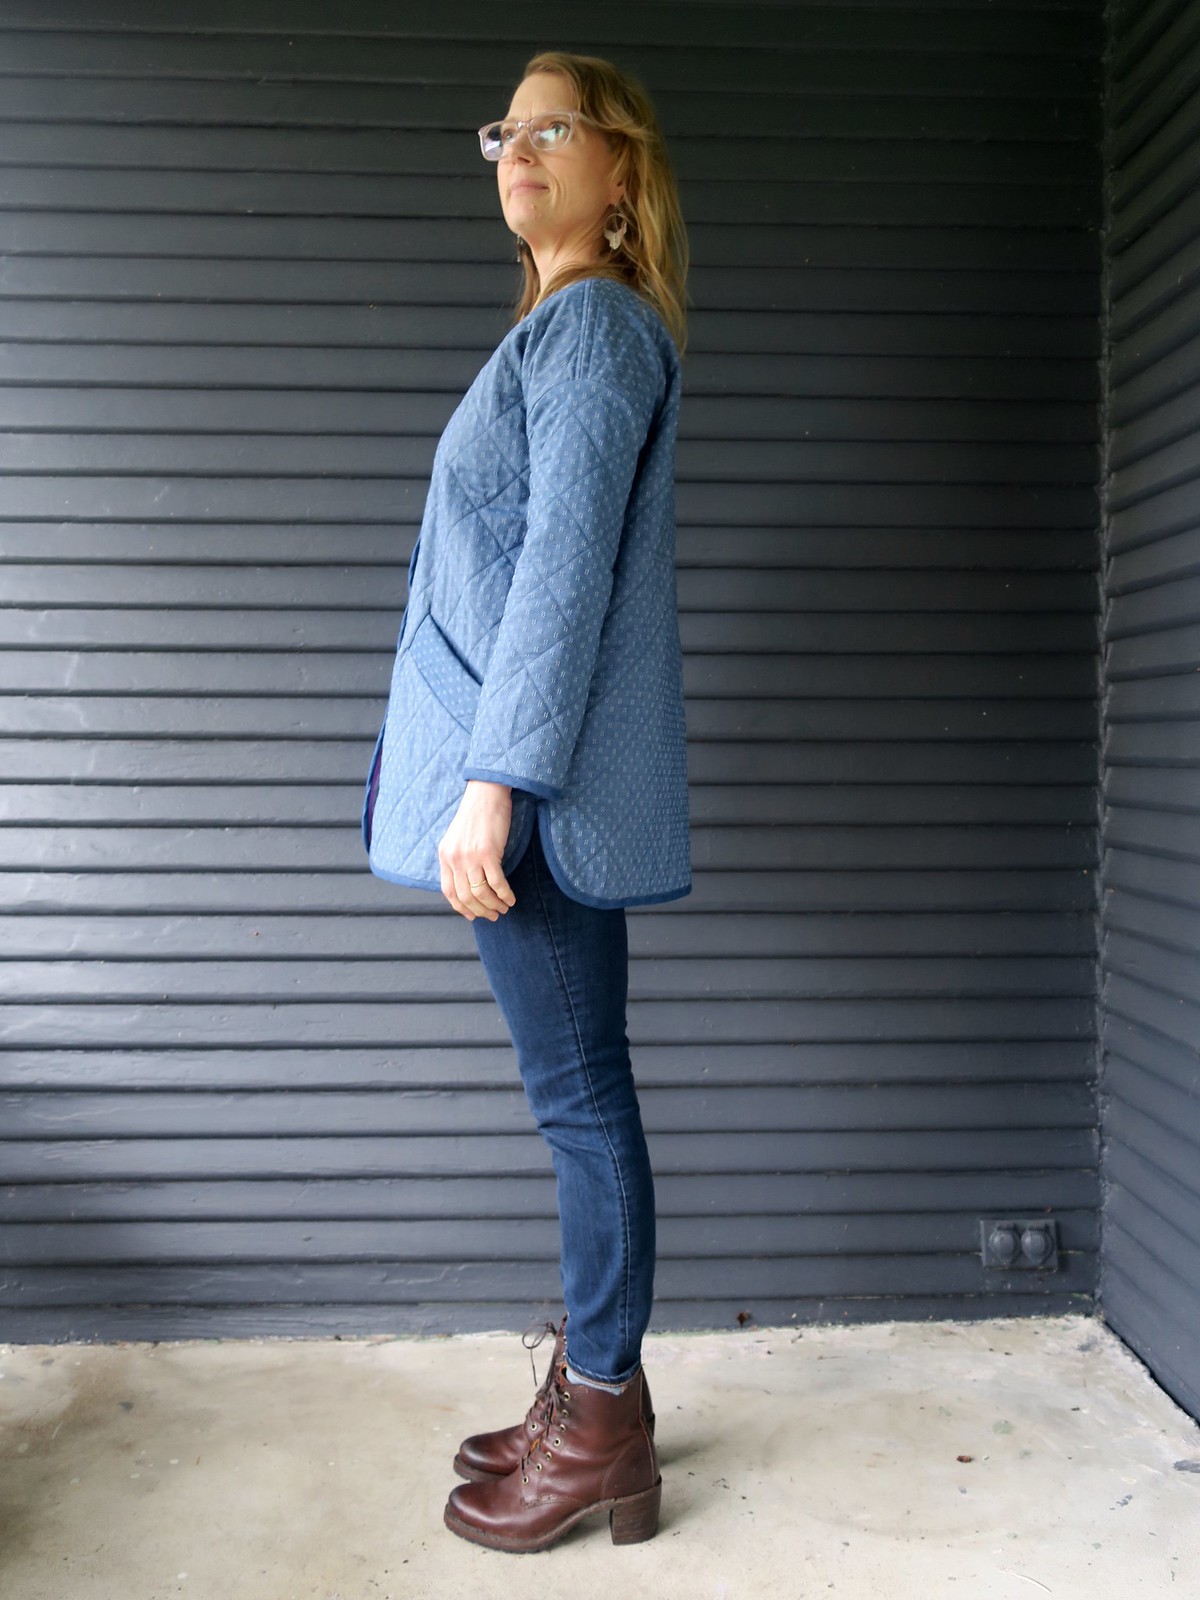
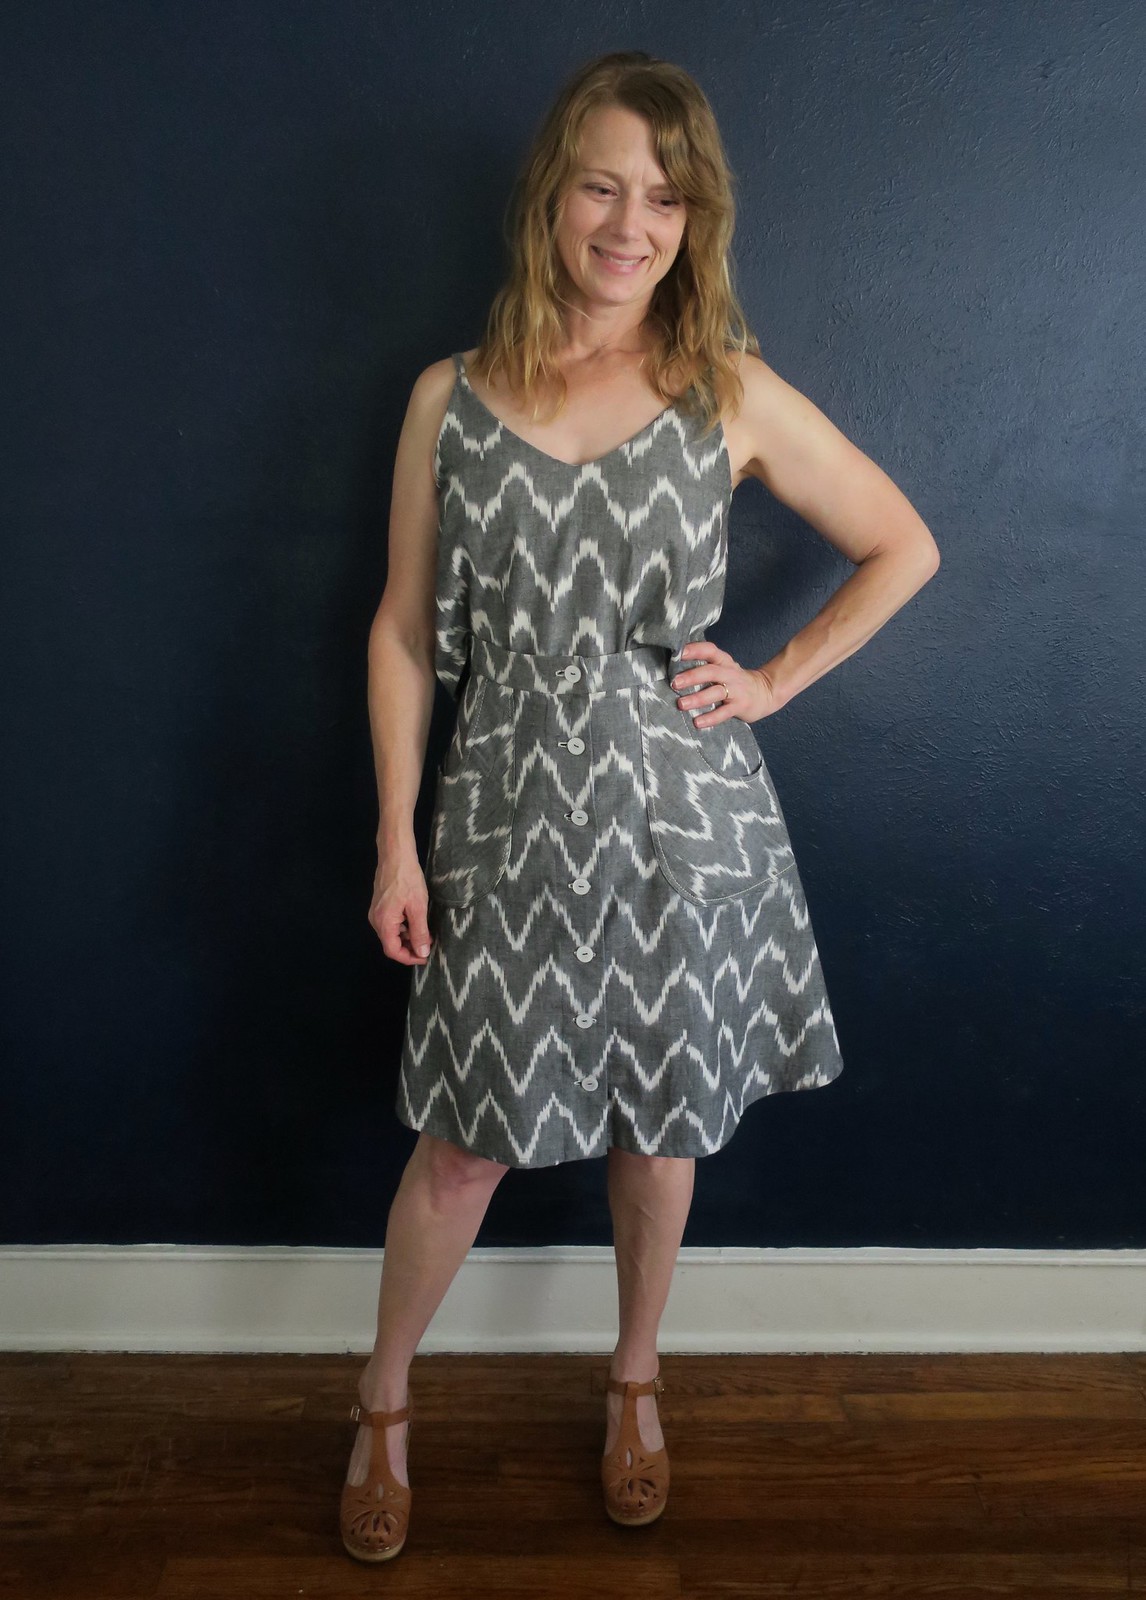
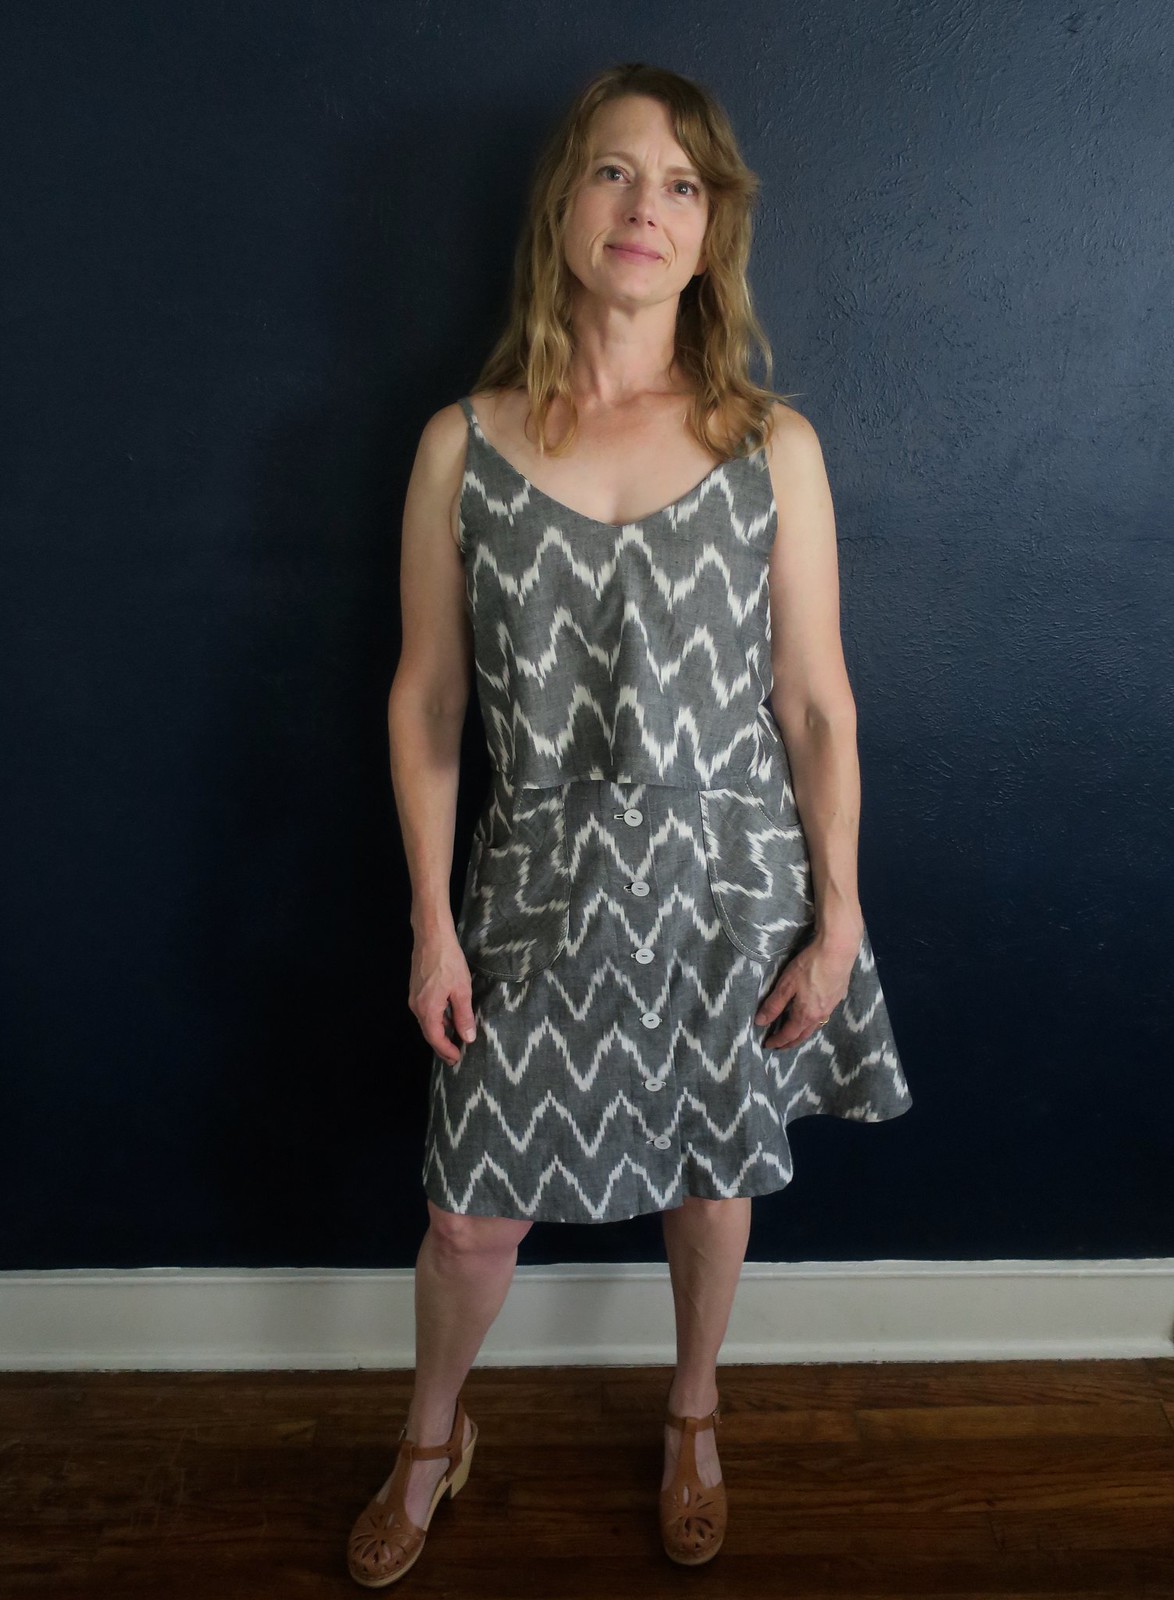
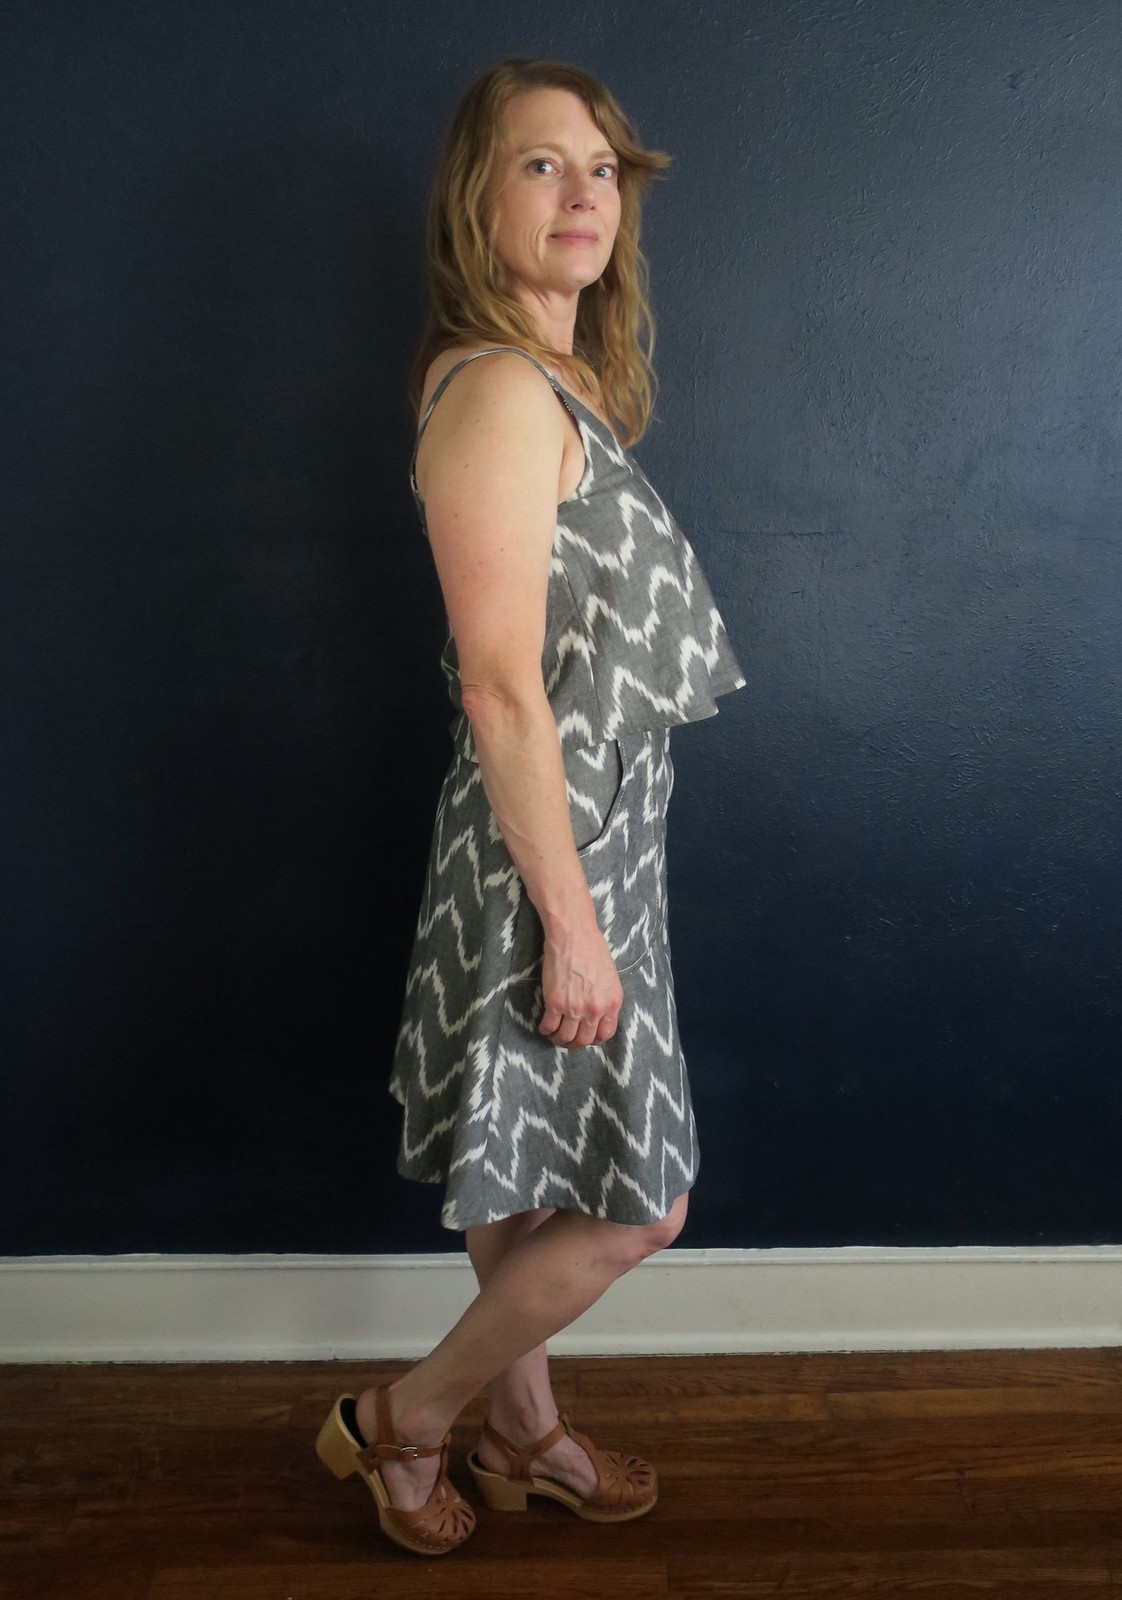
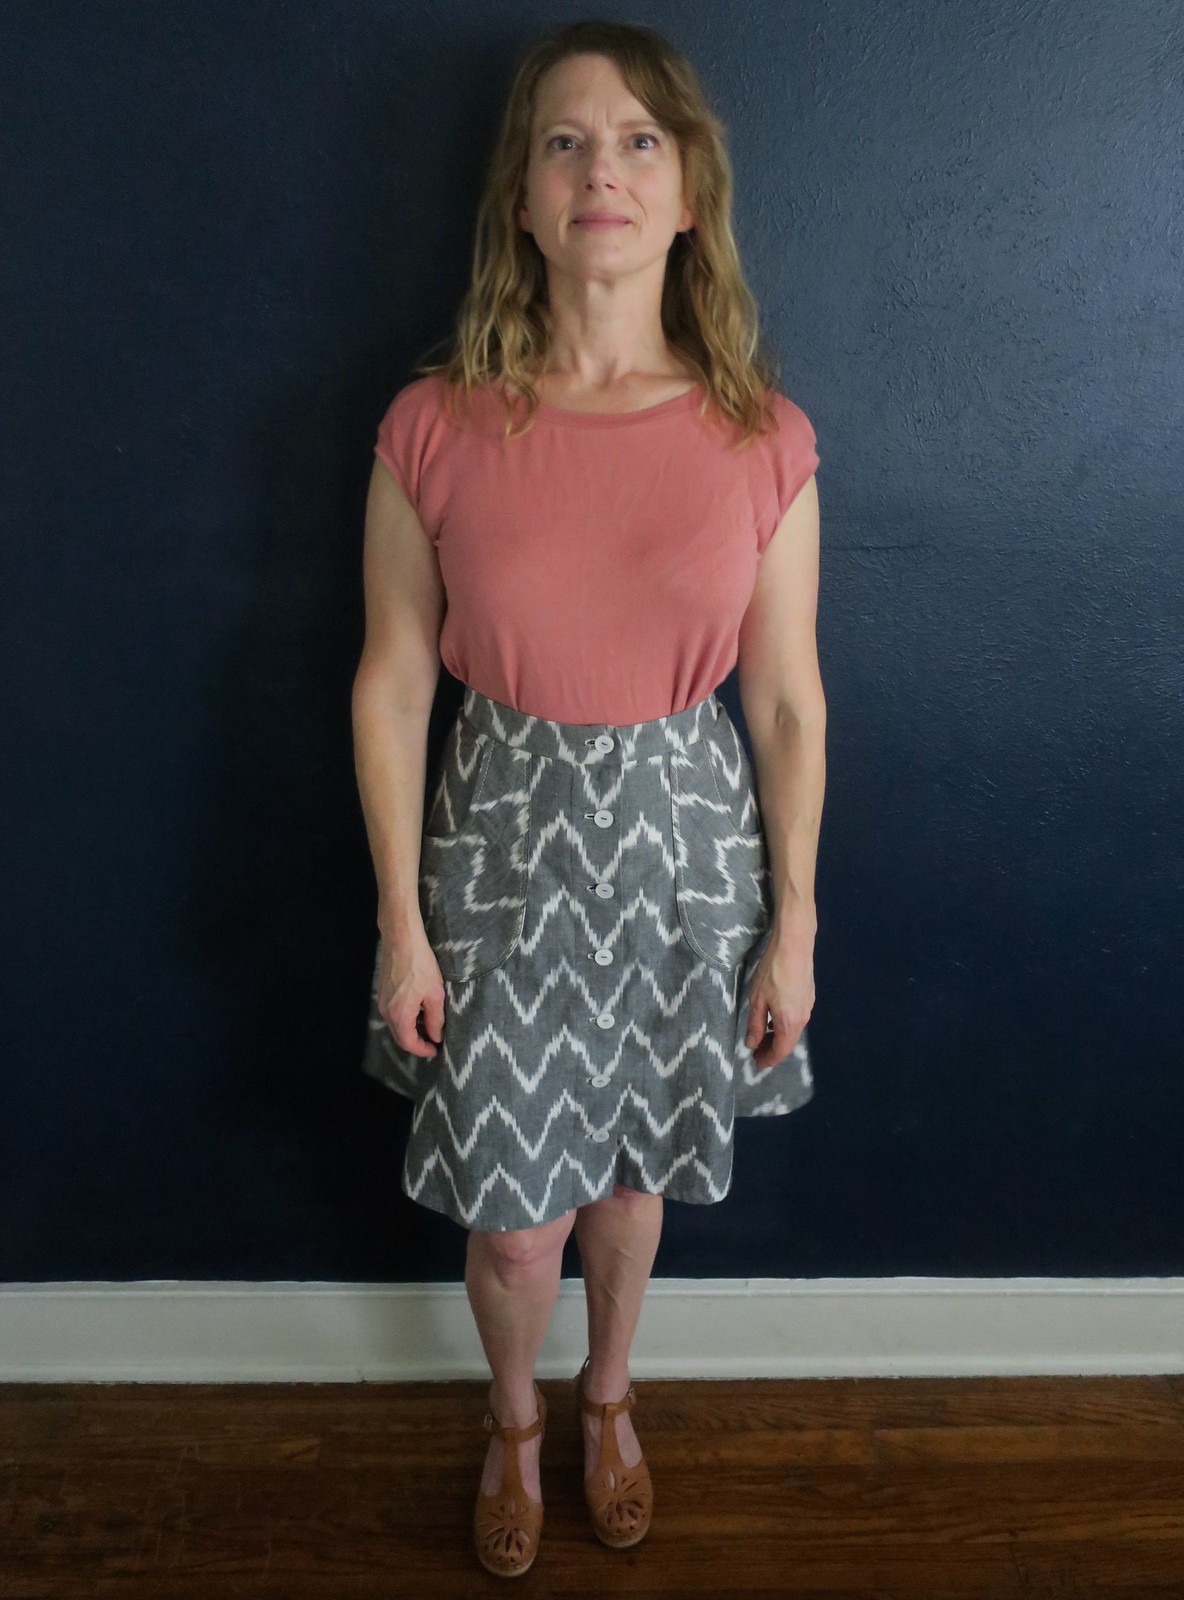
I so love that dipped hem!
And those kimono sleeves are making me swoon.

Melilot button down

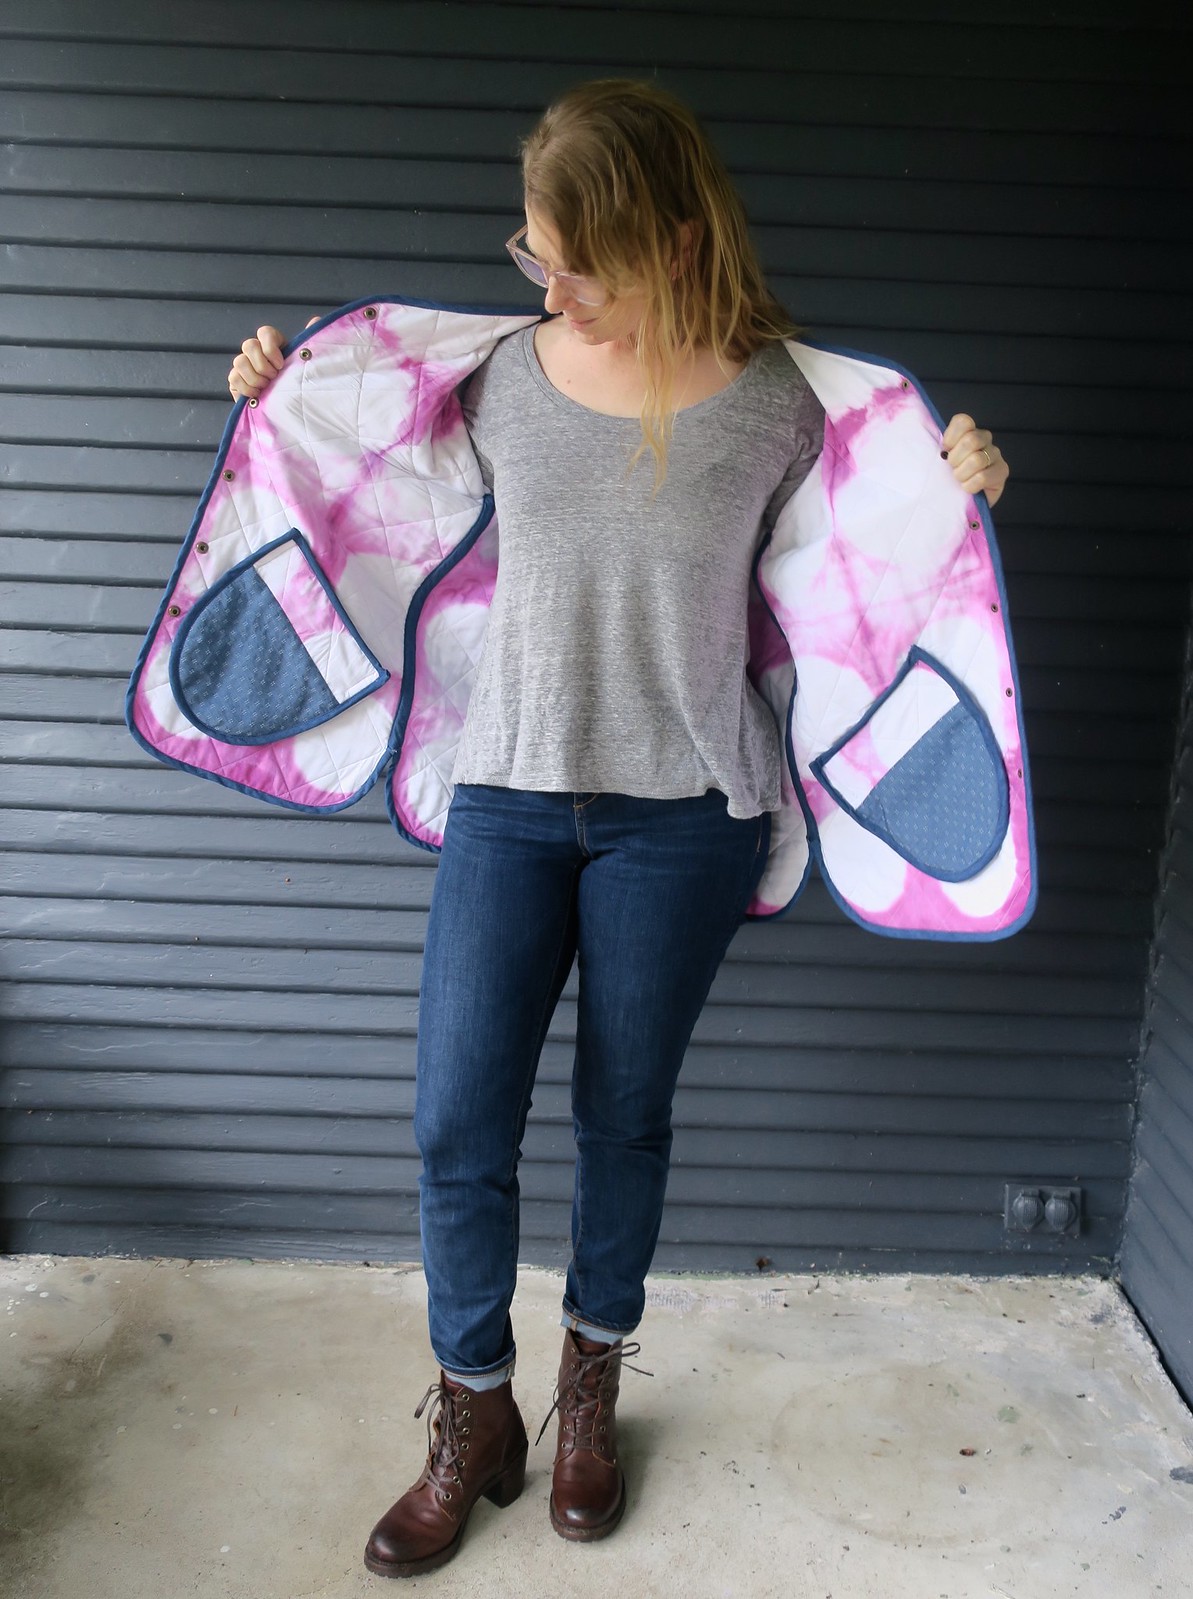
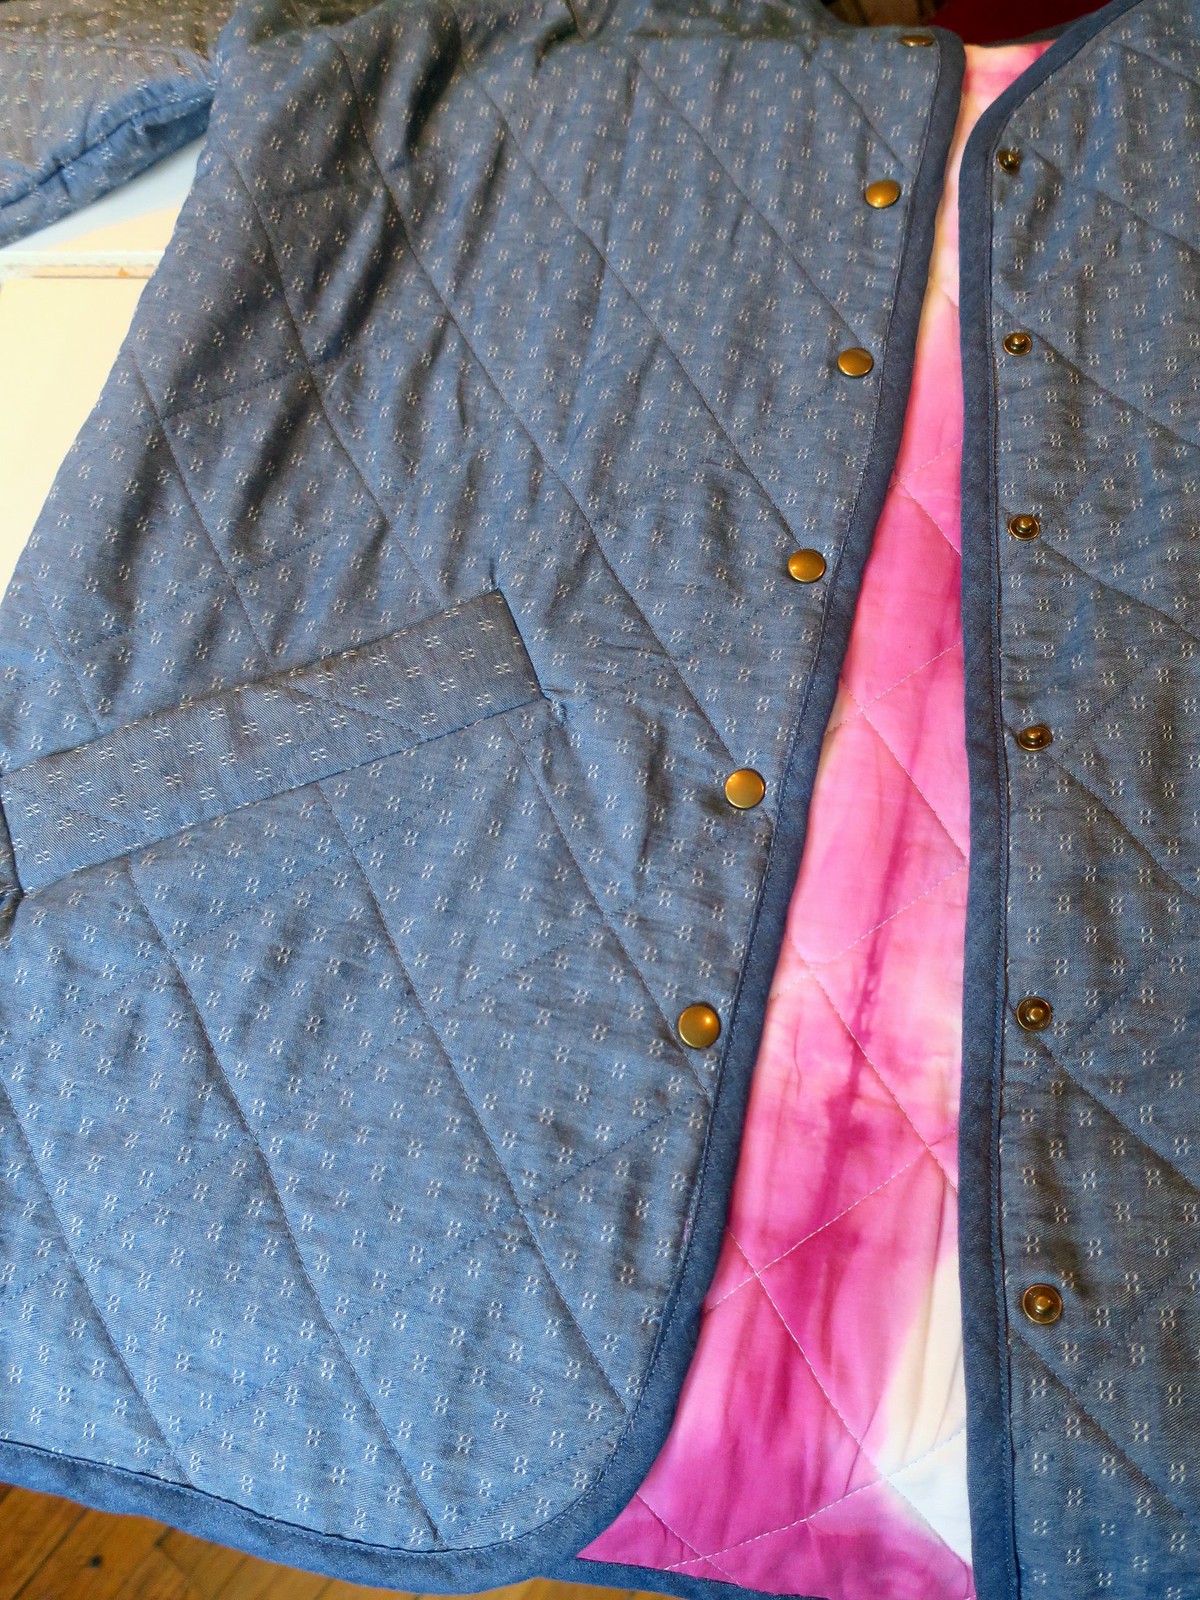
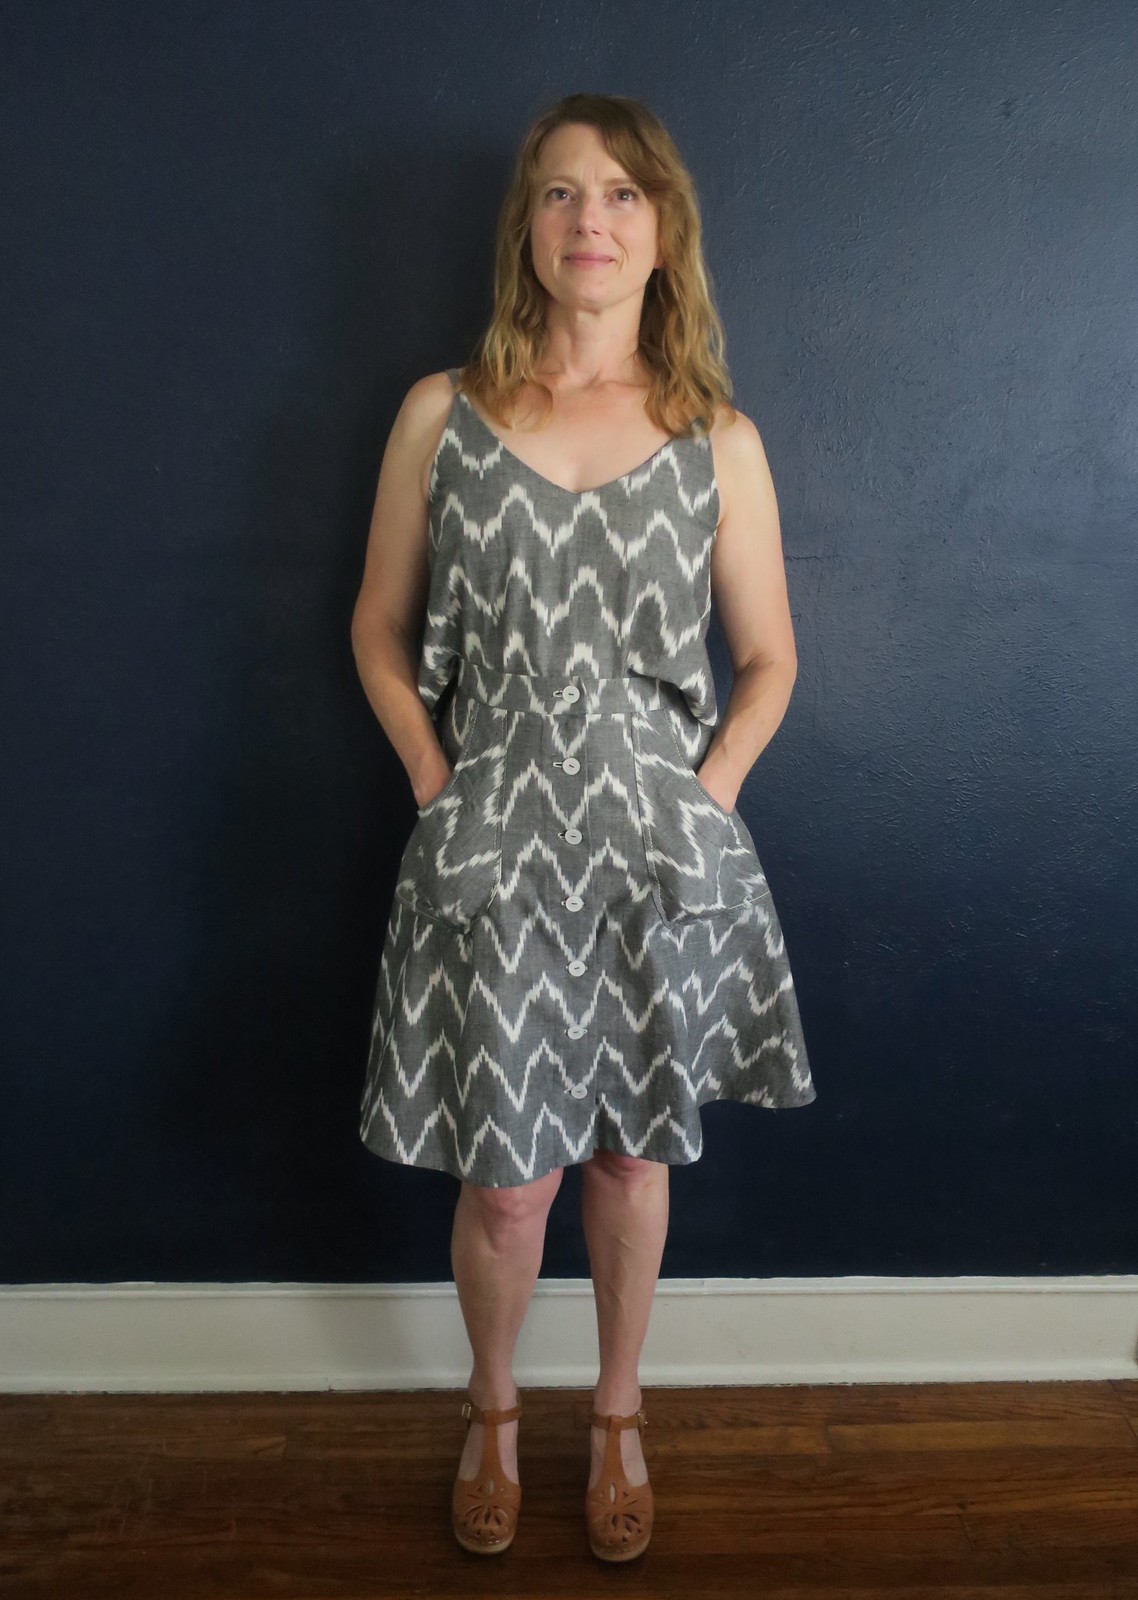
I got those awesome textured brass buttons at Super Textiles in Dallas. I think they are perfect with this fabric.

Melilot button down

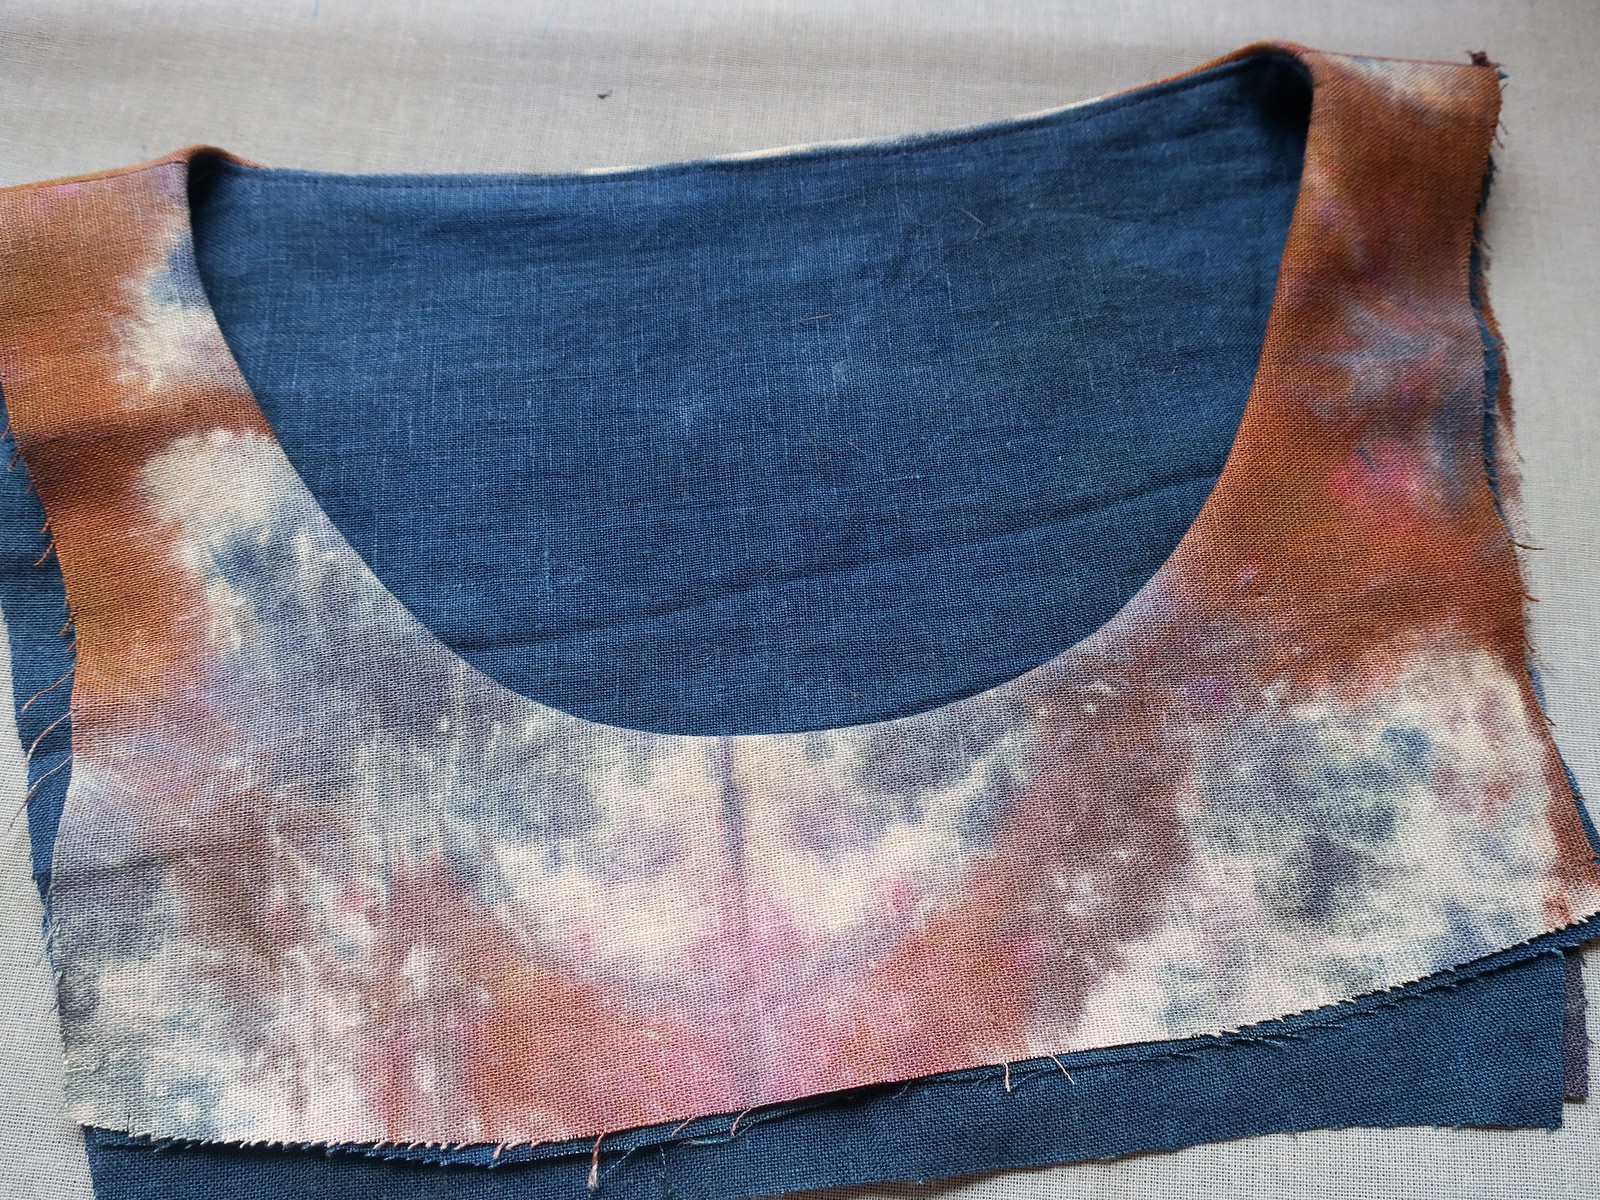
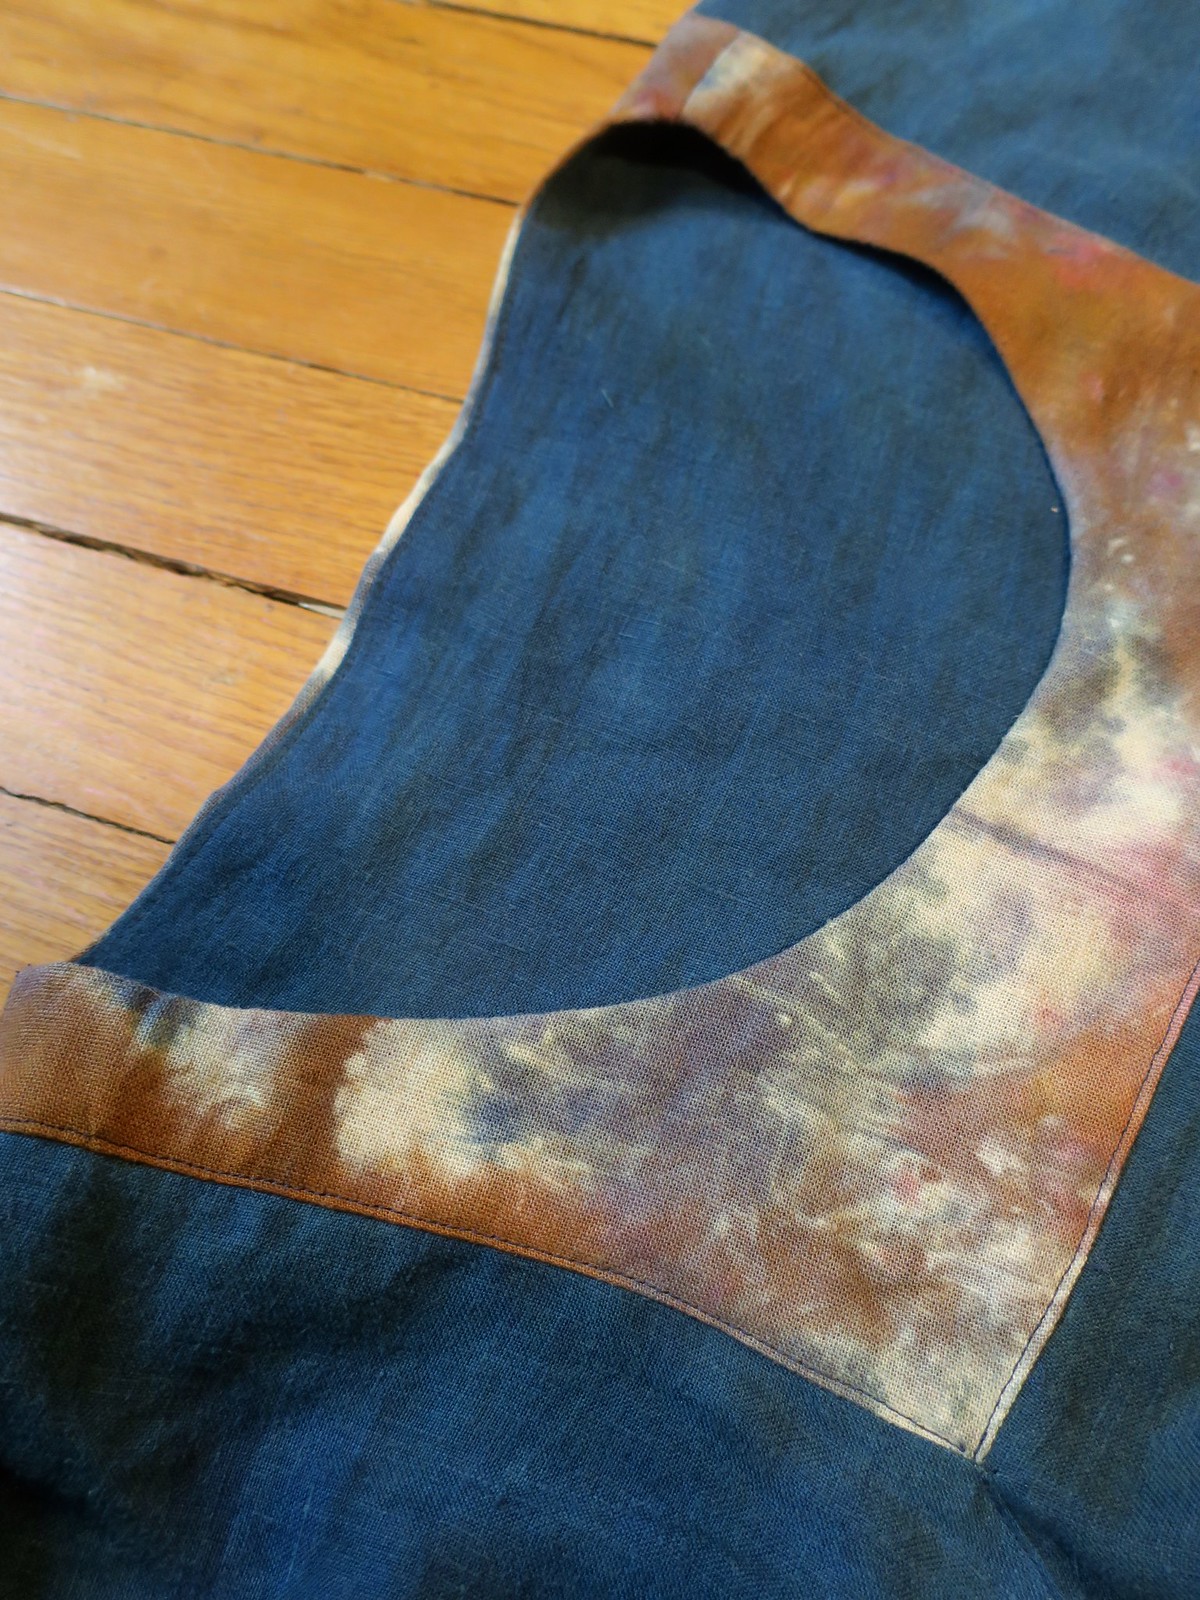
At first I wasn't sure about this fabric because it is quilting cotton weight and quite stiff. I just loved the print so much that I couldn't not use it. I don't mind the structure of it as much as I thought I would and I'm sure it will soften up with subsequent washing and wearing.

Melilot in the wild
Melilot in the wild under my favorite tree at the Fort Worth Botanic Gardens, the Palo Verde

Melilot Button Down:
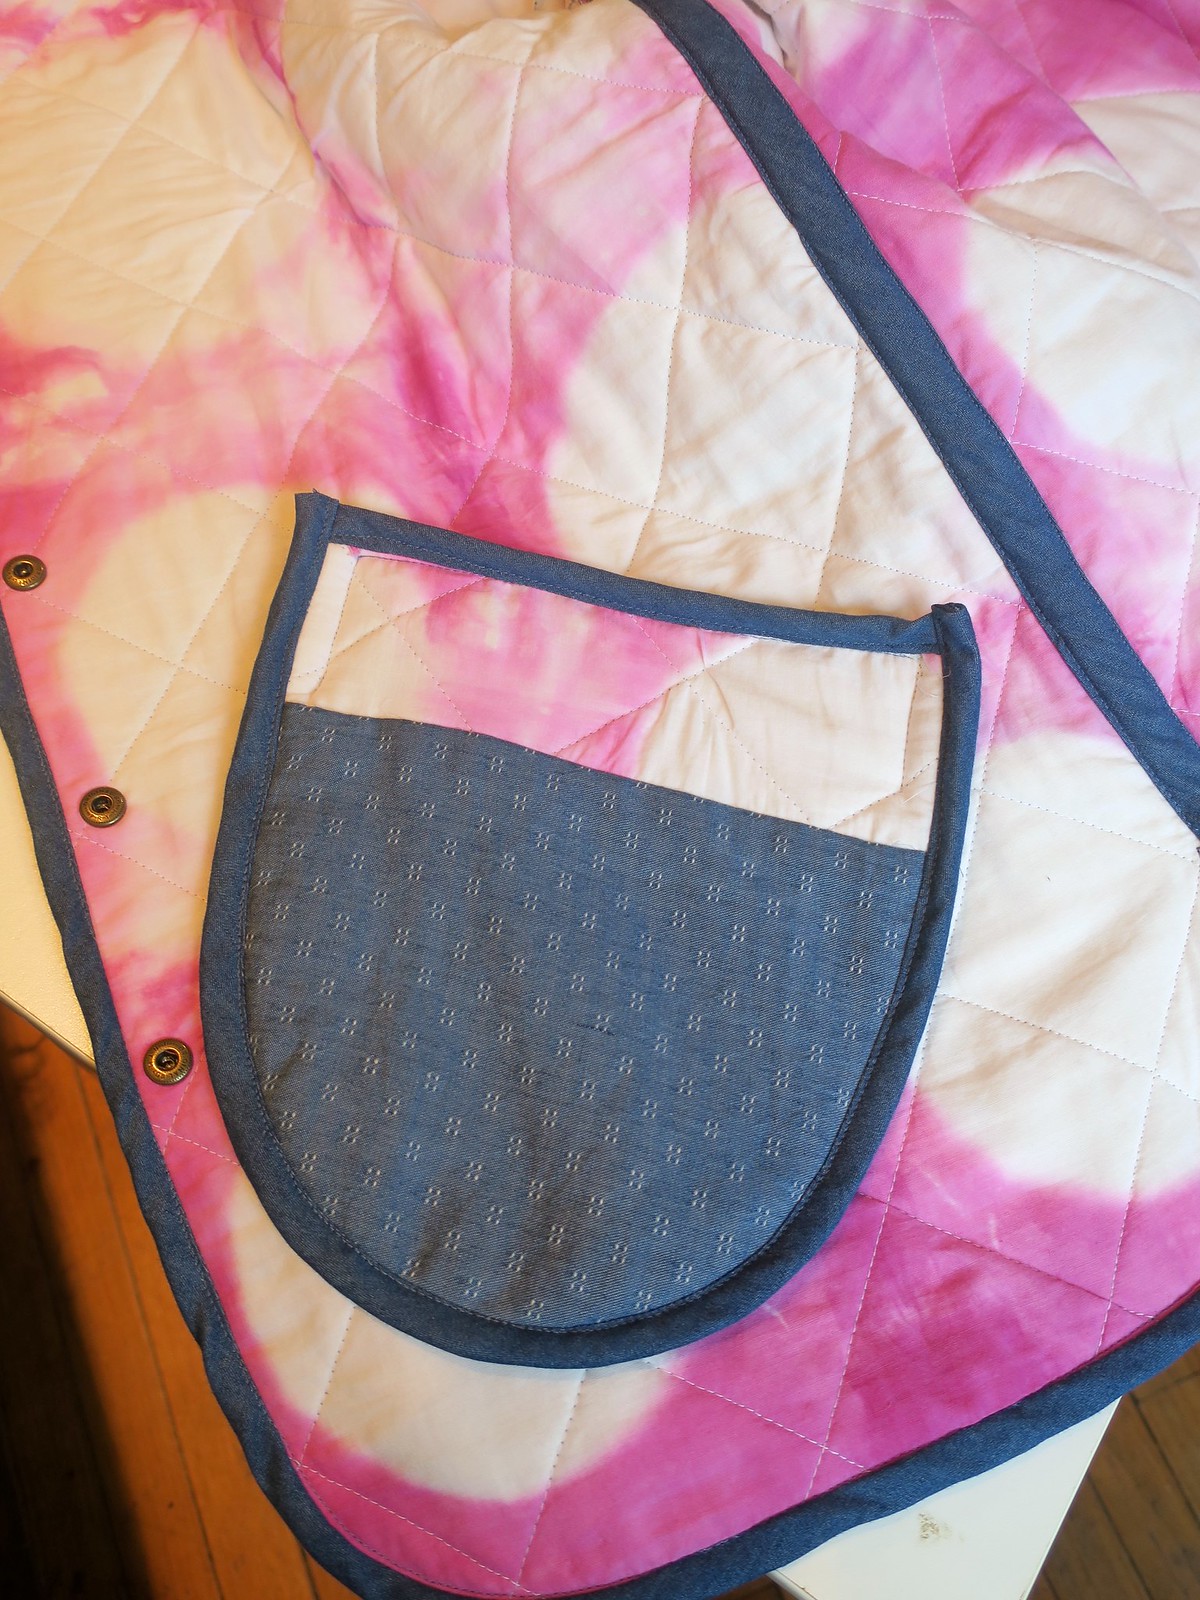
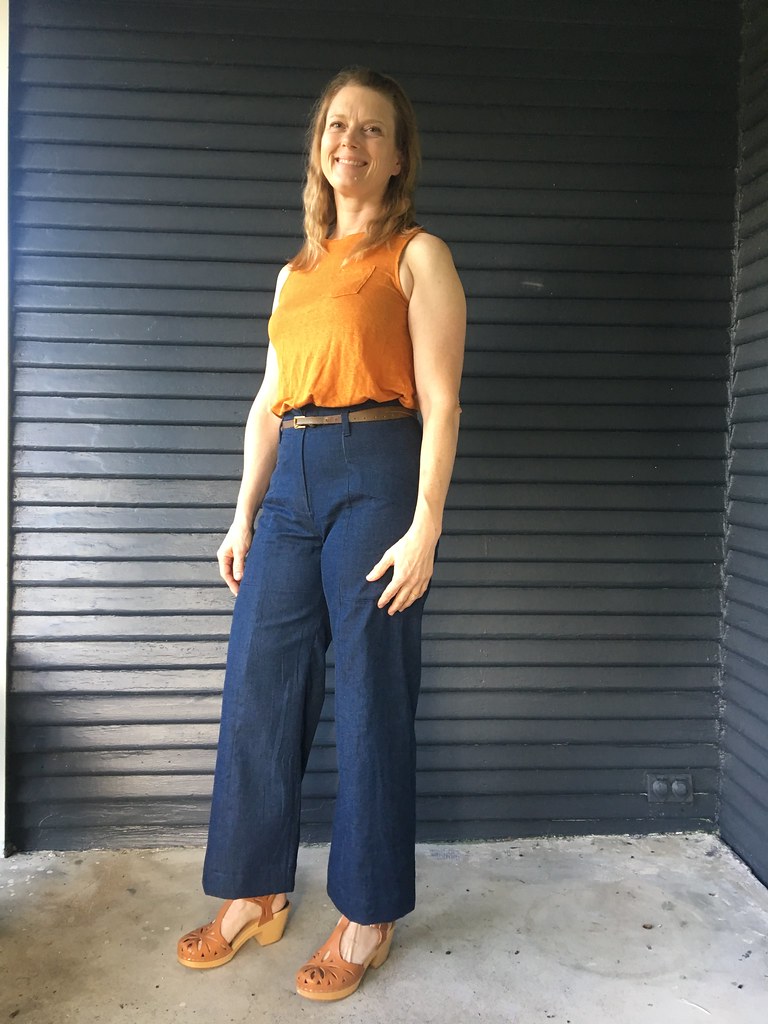
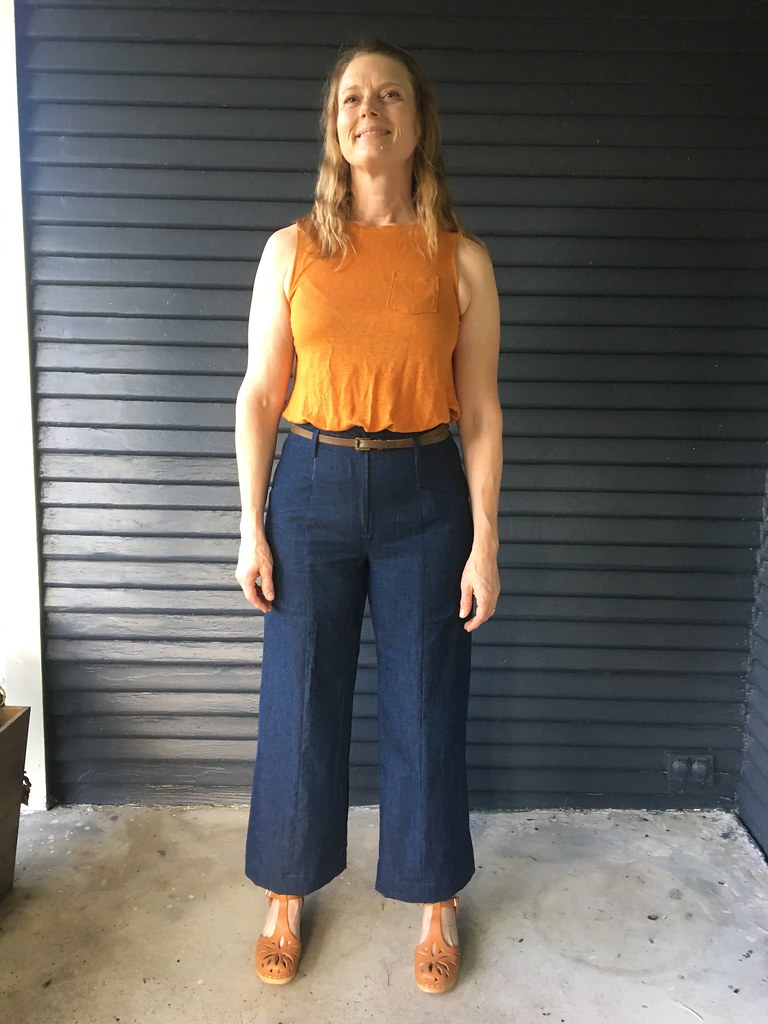
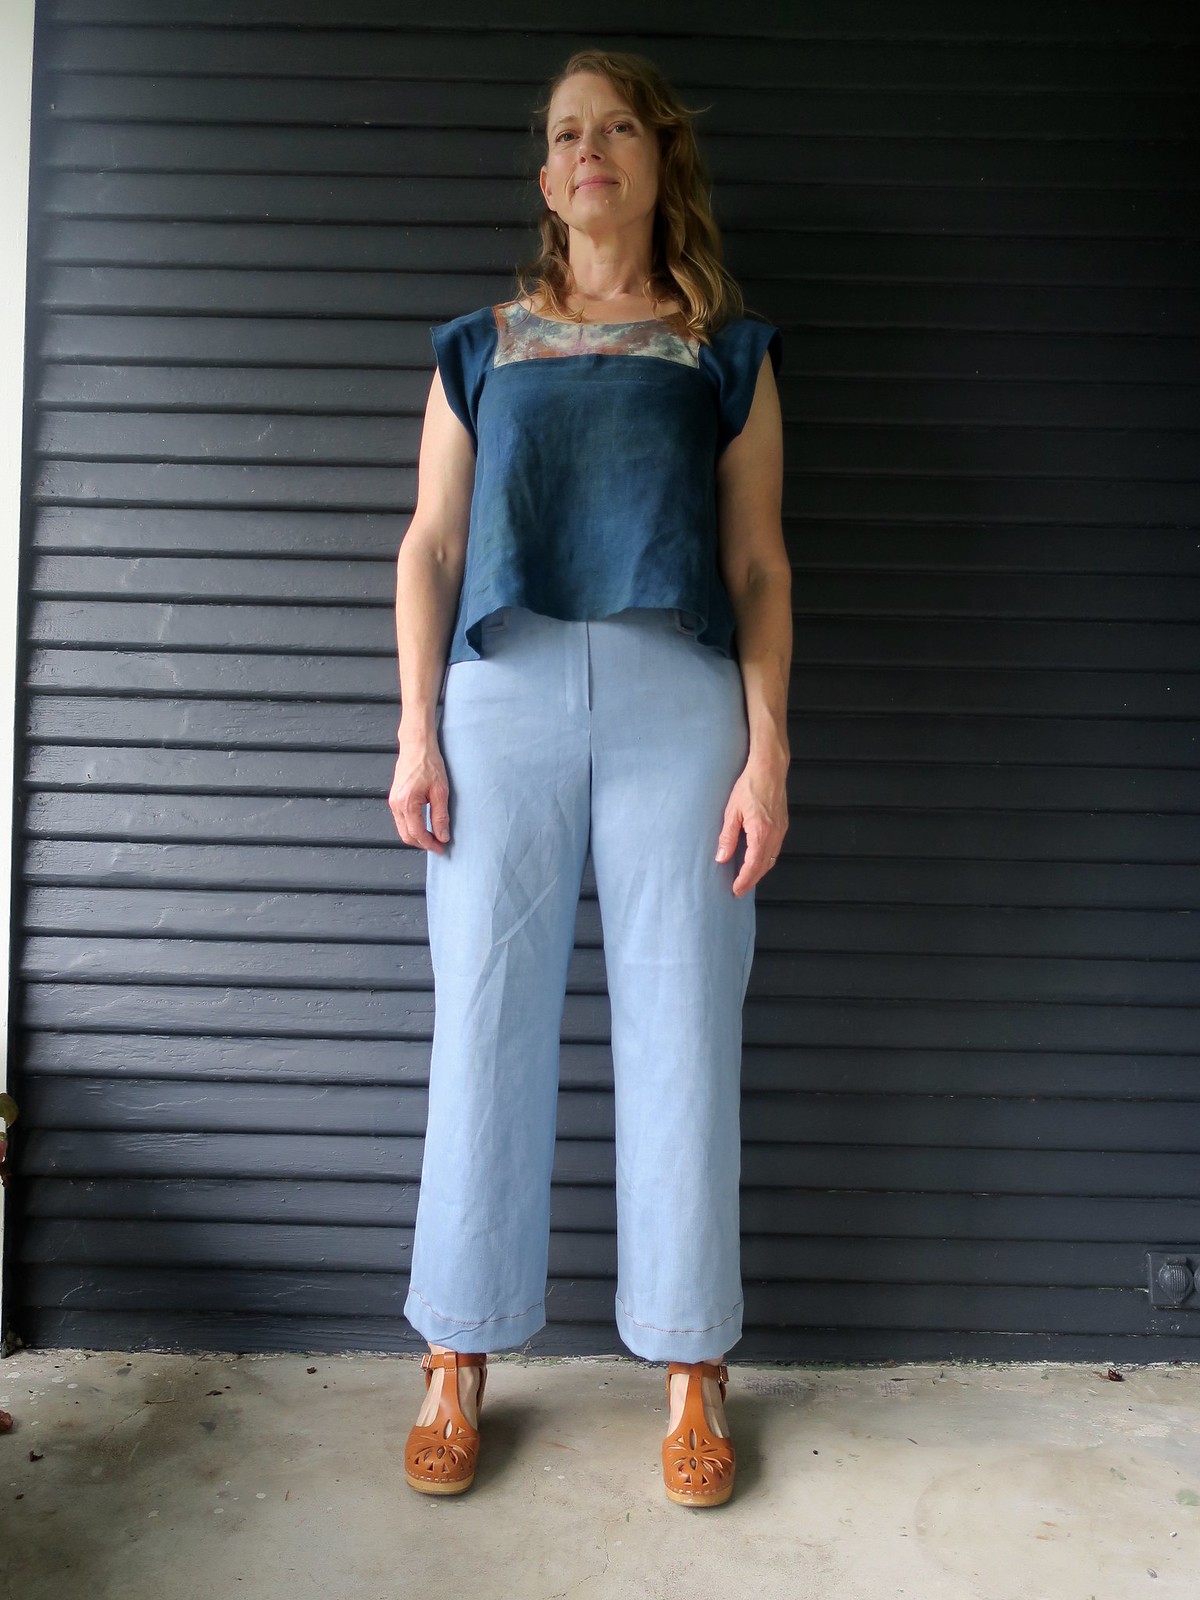
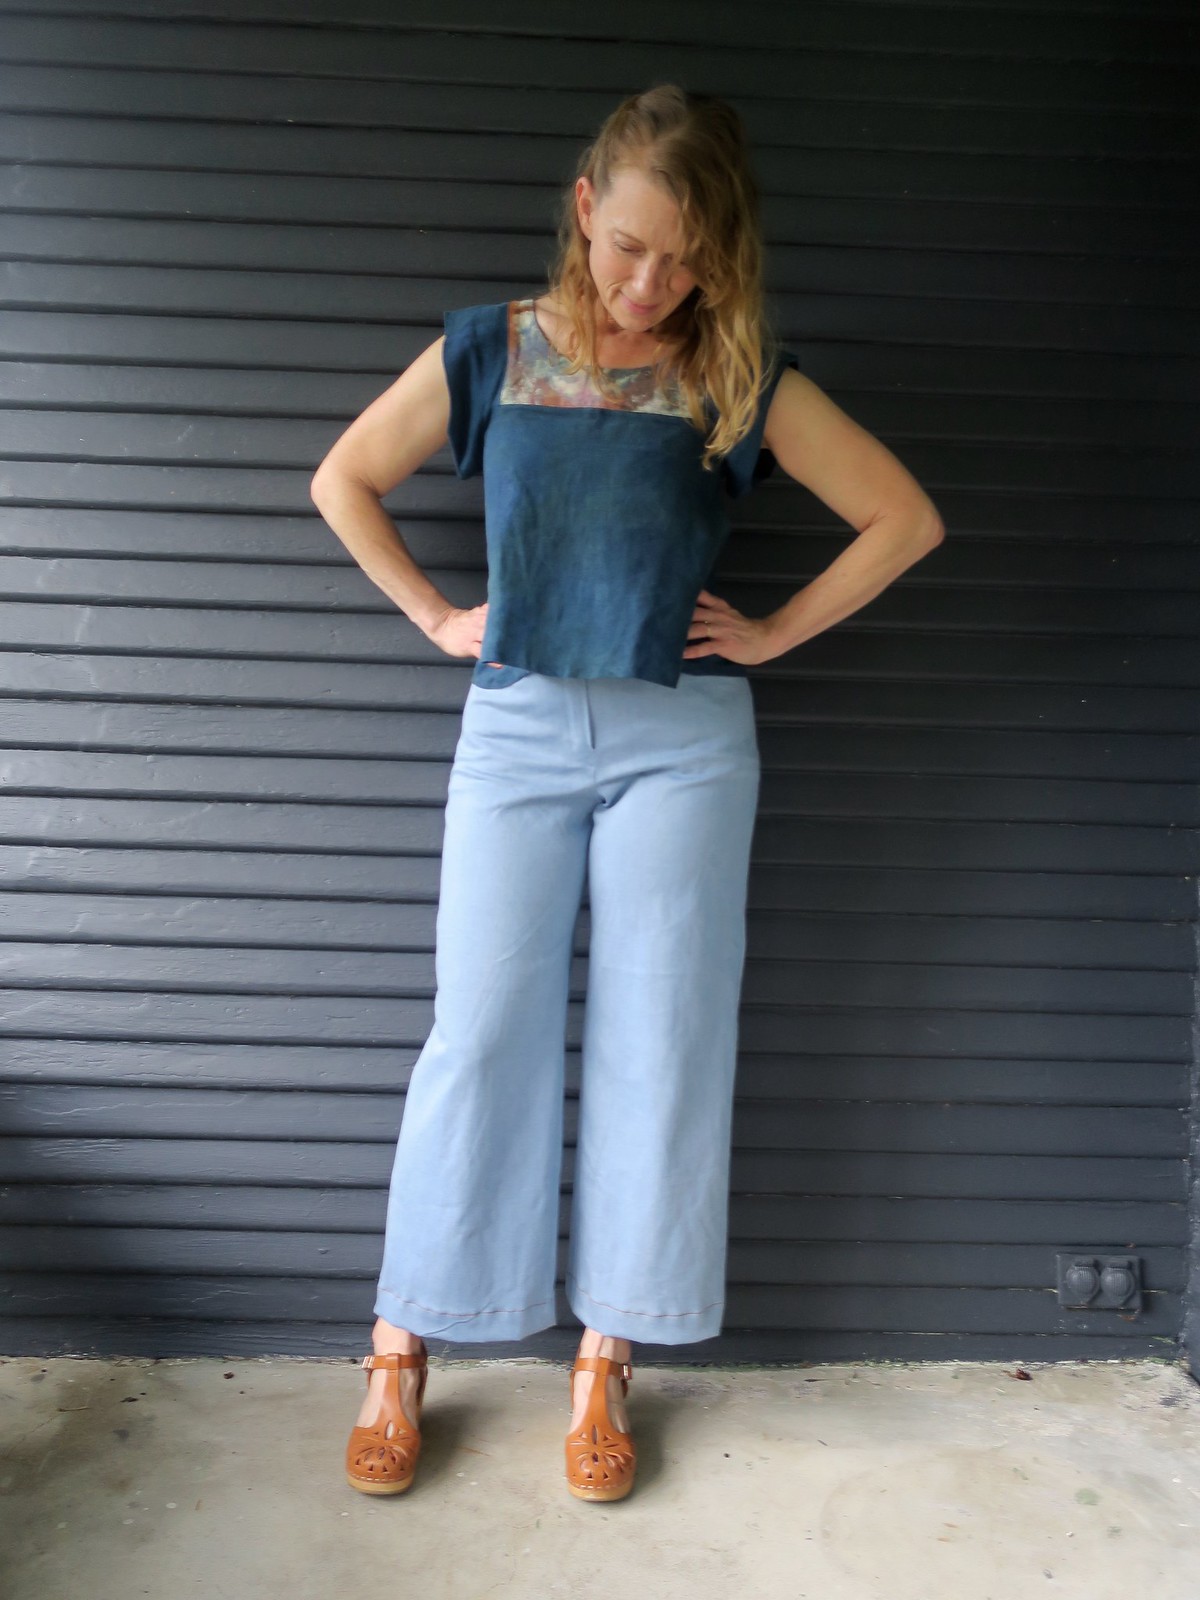
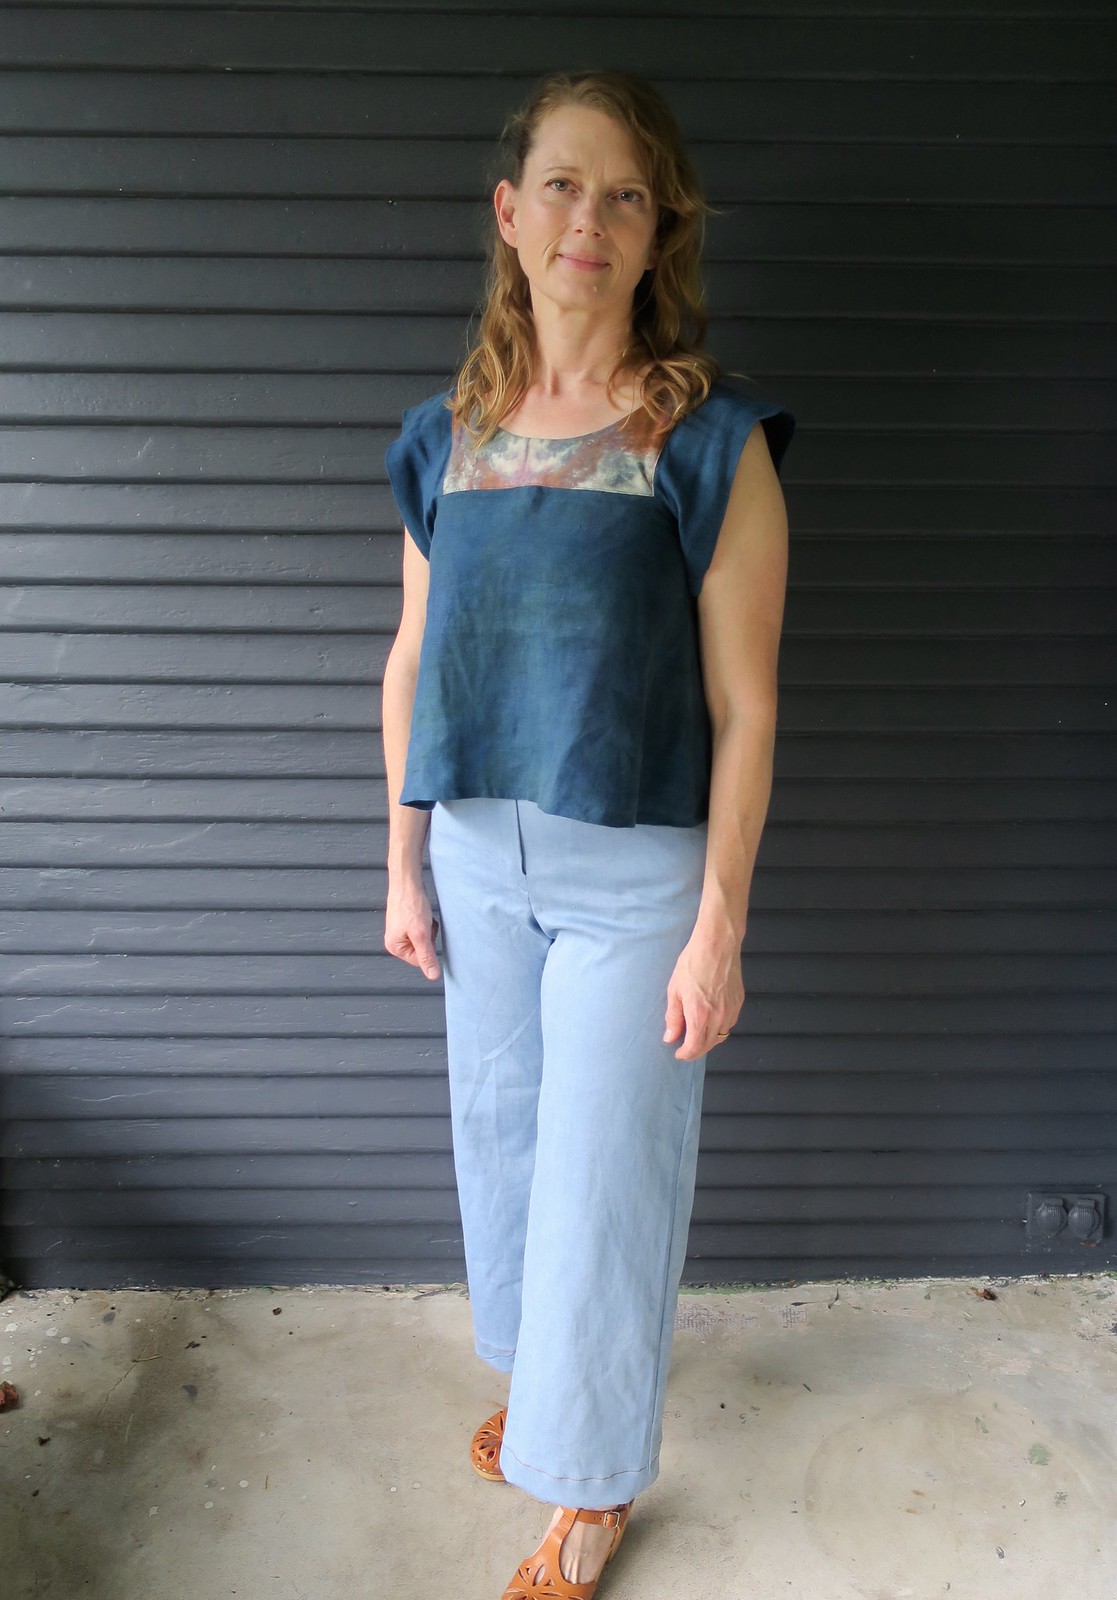
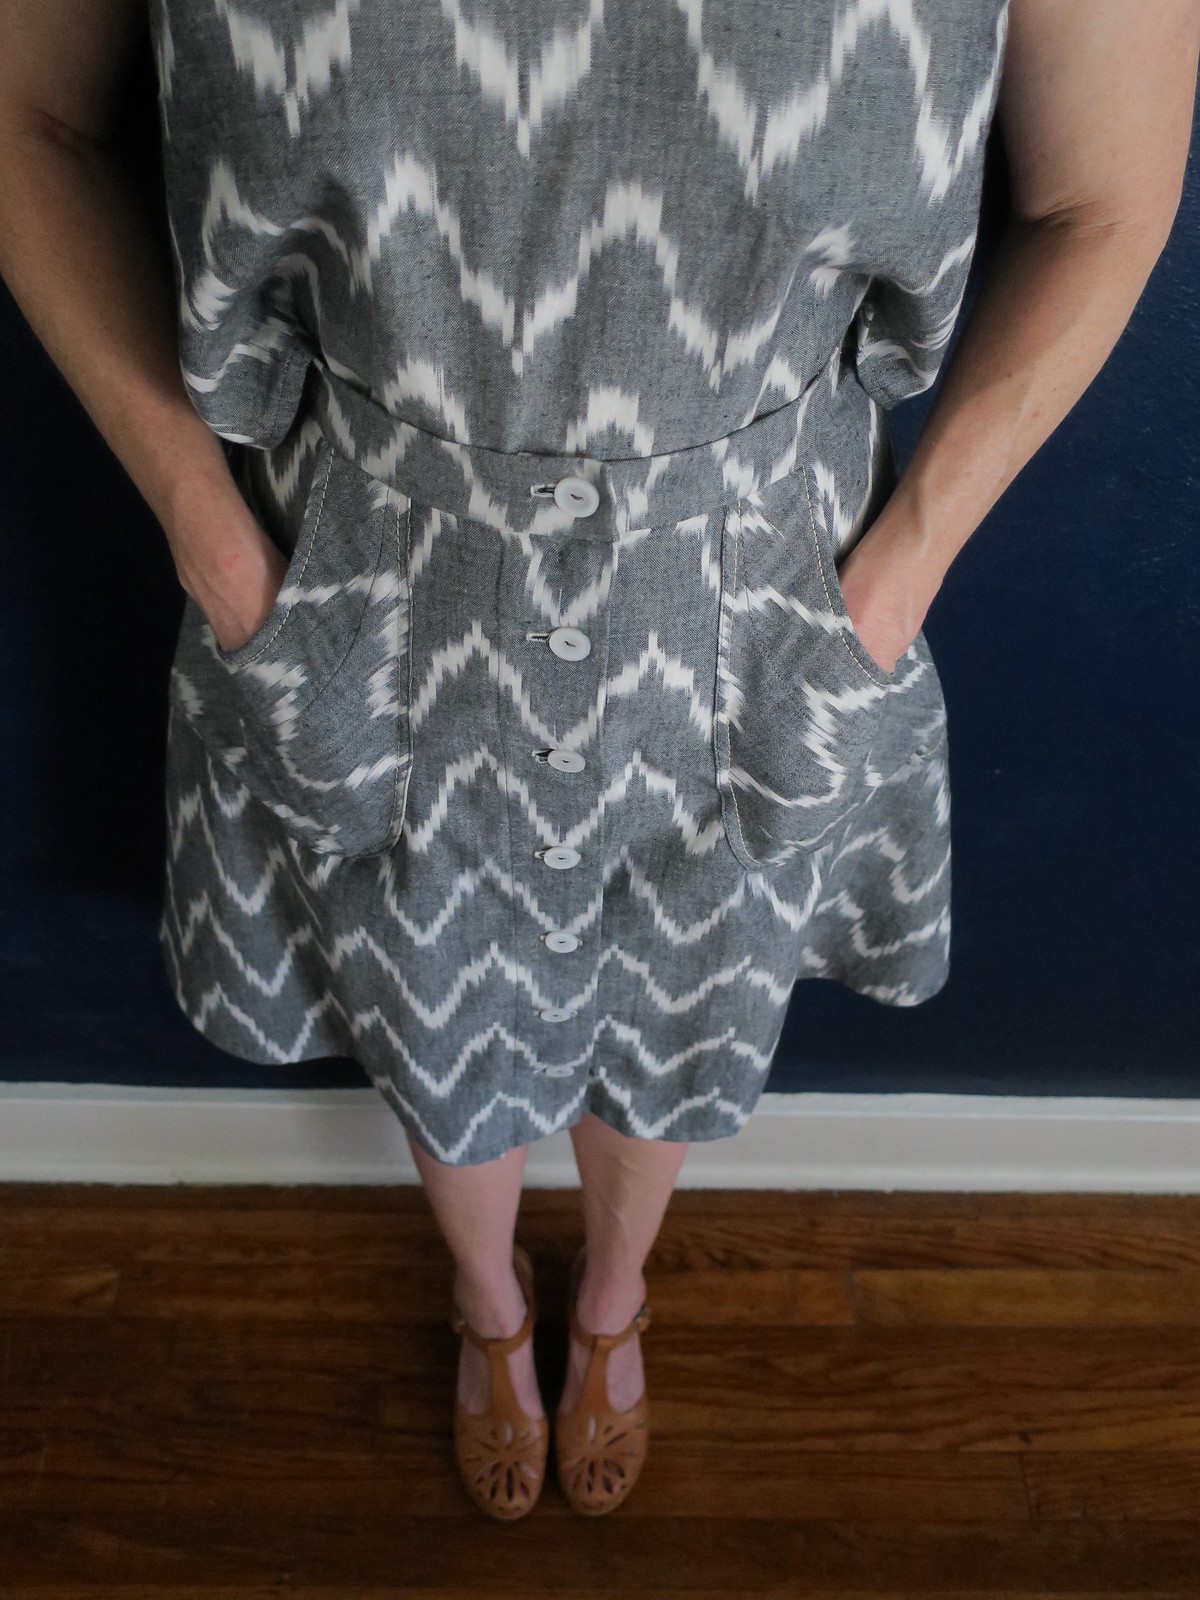
View B minus the pockets
Size 38
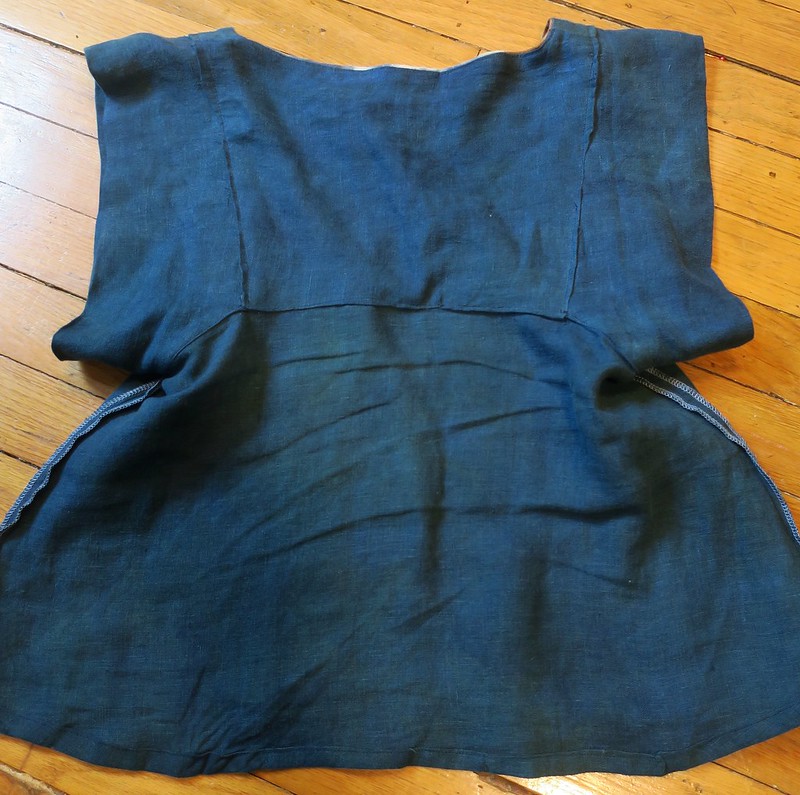
Alterations: Shortened at shoulder seams, sway back adjustment and added fish eye darts

I am a big fan of Deer and Doe patterns and this is my second make. I have made the Belladonne dress but never got around to blogging it (I should do that its really cute!) and I own the Fumeterre skirt but have yet to make it. I am realizing more and more that once I have a pattern fitted to my liking, making more versions of that pattern makes so much more sense than always moving on to the next thing. Don't get me wrong, I won't ever stop buying new patterns completely but my stash is huge and I can often find what I need out of a pattern that I already own. I am such a slow maker that I will never be the first to make and share a new pattern, and that is ok with me.

Here is a little video I made explaining the pattern alterations. I hope it makes sense!

Saturday, November 24, 2018

Look How Happy

The prompt for Bpsewvwenber over on Instagram today was "Craziest Pattern". That got me thinking about some of the more complex things that I have sewn. Aside from my Sophie swimsuit, I would say that this vintage Butterick 5449 swimsuit pattern would be one of the more complicated things I have made. I pulled it out and looked back at the photos that Frank took of me on my 40th birthday in Tulum. I can't believe now that I was too chicken to post these, so I am remedying that today, three years later.

Butterick 5449

This suit is adorable and I'm super proud of its construction. I look happy as can be here, and I was. These were taken at Xcacel Beach, our favorite beach on that first trip to Tulum. We went twice and took our friends back the next trip we made. Sadly this beach is now closed and being developed with hotels. It was a turtle sanctuary and it was one of the most beautiful beaches I have ever been to.

Butterick 5449

Butterick 5449

Butterick 5449

Xcacel beach

Butterick 5449

I made a muslin of this suit and altered both the pattern pieces and the construction somewhat. Obviously swim fabric today is much stretchier than in the 70s, so I sized the bottoms down quite a bit. I fully lined it as well, the pattern instructions only have you line the crotch. The pattern calls for bias binding around all the edges. I opted for swim elastic wrapped in nylon/spandex swim fabric, which I learned from this tutorial on Tuesday Stitches. I love this way of finishing the edges of swimsuits, I think it looks nice and clean and gives a pop of contrast.

Butterick 5449

I also altered the way the straps connect. The pattern has the neck halter ties go through loops on the back and tie at the middle back. I opted for a fixed halter and a bikini hook at the back. Next time I would make the halter part adjustable, but otherwise I love the way this looks and works.

Butterick 5449

You can see here how I altered the bottom pattern pieces. I took a good amount off the side seams, and changed the way the crotch seam connect. I used a bikini bottom pattern that I had perviously altered from the Papercut Soma Swimsuit to help with the alterations on this suit. With the binding style that I used, you do not turn the edges of your swimsuit under, so I took that into account when changing the pattern pieces. Unfortunately the suit is a tiny but small in the bust and pulls down. That could be partially remedied with halter ties, but I think I need to alter it a bit more for coverage next time. Right after these photos were taken on the beach I got pushed down by a wave and the whole top got pulled down!

Butterick 5449

I am so glad that Bpsewvember inspired me to finally share this gorgeous swimsuit!

Sunday, October 28, 2018

République du Chiffon Nicole Jacket

I became enamored with the République du Chiffon Nicole Jacket last year. I suppose I really, really liked the version on their website because I also went with chambray for my jacket.
  République du Chiffon Nicole Jacket

This jacket was a long time in the making, and I'm just now blogging it almost a year after finishing it. I downloaded the pdf pattern in December of 2016. It was only in French and I spent some time trying to translate it, but just got frustrated. Luckily for you, it looks like it is now in both English and French. I had purchased my fabrics and batting to quilt, and dyed my lining fabric, but the project came to a stand still, the weather turned warm, and I moved on to other things. At Thanksgiving last year, with my moms help, I made a quilt sandwich, cut out smaller pieces of that sandwich to quilt and got those pieces all quilted on my old Bernina. Quilting the roughly pattern size pieces was much easier than trying to manage one huge quilt sandwich! Thanks for the knowledge mom.

Quilting fabric for Nicole jacket

I made yards and yards of bias tape in a slightly darker chambray for contrast.

IMG_1716

After we got the pieces quilted and the pattern cut out mom helped me muddle through the Welt pockets. Not being able to read French and never having made a welt pocket myself, I relied on mom's experience and we made it work. I am pretty sure our construction method does not match the pattern instructions.

République du Chiffon Nicole Jacket

République du Chiffon Nicole Jacket

République du Chiffon Nicole Jacket

This jacket would have been difficult to muslin because it is made with quilted layers of fabric. I suppose I could have used a thick fabric like a fleece or pre-quilted something or other, but I did not do that. I find the fit to be tight around the armhole. It works fine with only one thin layer but I would not be able to wear more than a long sleeve t-shirt under it. I think this would be easy to fix if I were to make this pattern again. However, as much as I love this jacket I think one is enough. There are other quilted jacket shapes out there to try like the Tamarack. Last year I also had a goal of making myself a quilted puffy vest but never got around to it. Dang my slow sewing habits!

République du Chiffon Nicole Jacket

République du Chiffon Nicole Jacket

I LOVE  the surprise contrast that the hand dyed lining in fuchsia creates. It is just the right pop of color and fun for this otherwise understated jacket.

République du Chiffon Nicole Jacket

République du Chiffon Nicole Jacket

I totally enclosed all of the interior seams (except the armhole) with my hand made bias tape. I love the way it looks on the inside, so neat and tidy.

République du Chiffon Nicole Jacket

République du Chiffon Nicole Jacket: Size 38

Loves: The dropped shoulder, curved hemline, boxy fit, basically the overall design

Dislikes: The tight fit of the armholes

Materials:
2.5 yards Chambray from Joann for the main body
2.5 yards of light weight white cotton that I hand dyed for the lining
Cotton batting, twin size
Self made chambray bias tape (pattern calls for 9 yards)
Dritz 12mm brass anorak snaps

I can't really comment on the pattern instructions as I don't read French and I just made it up as I went. I do love the drafting, aside from the tight armholes, perhaps I should have sized up. This was my first République du Chiffon pattern to sew and I don't think it will be my last. I really want to make the Suzon Shirt, but it only comes in paper format and is a bit expensive with international  shipping. I never considered the Petula top until I saw Sally Oh's version and it is on my list now too.

Wednesday, October 24, 2018

Celestial Top details

I mentioned that I altered the construction of my Celestial top a bit to give it a cleaner finish on the inside. Here are some more details of how I did that.
  Celestial Top and McCalls 7445

First I opted to fully line the yoke section, rather than using facings. I am not a fan of facings for the most part. Either they flop around or you have to sew them down, usually in a way that is visible from the outside. I used my main body fabric, which is hand dyed indigo linen, to fully line my facing.

Celestial Top and McCalls 7445

I under stitched the neckline to get a nice clean finish. This technique is one of my favorites and I think it really gives a great finish. Here is my process:

  • Cut front and back lining pieces out of the same pattern pieces as the outer yoke. 
  • Sew yoke pieces together at the shoulders and do the same for the lining pieces. 
  • Press all of the shoulder seams open.
  • Sew the Yoke to the Yoke lining at the neckline with right sides facing.
  • Clip your seams.
  • Press the lining away from the Yoke. 
  • Stitch along the lining about 1/8" from the seam, smoothing the lining flat as you go around the circle of the neckline.


Celestial Top and McCalls 7445

Ignore my dusty presser foot...

Celestial Top and McCalls 7445

The under stitching process keeps the lining from rolling to the outside. You could use this same process if you opt for a facing as well.

Celestial Top and McCalls 7445

You can see that when the yoke is turned and pressed it gives a nice, neat finish along the neckline.

Celestial Top and McCalls 7445

The original pattern instructions have the sleeves attached with raw edges showing as well as the skirt or body of the top.

Celestial instructions

I was able to fully enclose all of these seams. After I finished my yoke I attached the body of the top to the outer yoke. Then I sewed on the sleeves, but only the outer portion. This was only tricky where they come to a point, but I was able to make it work. After that I turned the inside of the sleeves under at the under arm and tucked the rest of the inside sleeve under the yoke lining. I turned under my yoke lining and stitched everything down from the outside. I have not perfected turning things evenly, perhaps that is why I hate hemming, so it isn't perfectly even. However, I still prefer this method to raw edges showing.

Celestial top

You can see my top stitching as well as my under stitching here.

Celestial top

Let me know if you have any questions. I adore the Celestial Dress pattern and can't wait to make a dress version. My friend Gretchen who I originally sewed along with has made several versions of this pattern. Check out her dress with hand printed fabric here. She is such an inspiration. By the way, my mom dyed the fabrics for this top and gifted them to me. Aren't they fantastic?! Both are linen, the blue is indigo dyed and the yoke is ice dyed.

Tuesday, October 9, 2018

Parasol Trousers

These are my Parasol Trousers, a brand new pattern from Ensemble Patterns. I was lucky enough to be a pattern tester for the trouser portion of this jumpsuit/trouser pattern. It was my first time being a tester and I truly enjoyed the experience. Being on a schedule is not typically my thing for sewing, but it did push me to power through the fitting process, and helped me to continue my journey to understand pants fitting and get a great fit on my body.

Ensemble Parasol Trousers

Celina of Ensemble Patterns and Gabriela of Chalk and Notch released two sewing patterns in tandem. This one from Ensemble and the Orchid midi from Chalk and Notch. They are designed so that you can "create 3 different top options, 4 bottoms, a choice of 2 waistbands and so many ways to make it your own." What a great idea! You can read more about the pairing here

Ensemble Parasol Trousers

Once again I went with this kind of funny cropped length that I have heard described at 7/8 length and I am loving right now. Someday I will probably look back and say, those are so 2018, but I'm ok with that.

Ensemble Parasol Trousers

When I started making this pattern I really didn't think these were my style. They are dressier, or more professional, than pants I usually wear. But I am so in love with these pants now! This version is a wearable muslin in a lightweight (maybe too lightweight) chambray. Since I got such a good fit I will definitely wear them. I got them a little tight so I plan to make this exact fit again in a stretch denim or twill and I will utilize some contrast topstitching to really show off the great style lines and pockets that this pattern feature.

Ensemble Parasol Trousers

Parasol Trousers: Size 4 at waist grading out to an 8 at the hips
Loves: The pockets, the clean waistline with no waistband, the wide legs , the style lines and design with no side seam, and the fit in the butt
Dislikes: None!
Adjustments: Low butt, swayback, narrowed the front and back seams by 1/4", took in the waist and round pubis. Keep in mind that I made the tester version 1 and many of these changes might not be necessary for me now.

My measurements
Upper Bust 34"
Full Bust 36"
Waist 27"
Hips 39"

Wednesday, October 3, 2018

McCalls 7445 Meets Celestial Top

I am deep into pants fitting territory over here. I finished these McCalls 7445 trousers a few weeks ago. They aren't perfect and I have learned more about alterations that I may need since finishing these, but they are still a major accomplishment for me.
  Celestial Top and McCalls 7445

This pattern jumped to the top of my to sew list back in the spring and then languished in the unfinished pile waiting on a waistband and to be hemmed for ages. Along came the Celestial Top, their perfect mate. Once I finished this top I knew I had to finish these pants to go with it. The pants have a serious 70's vibe that I'm digging.
  Celestial Top and McCalls 7445

You can see that I have some extra fabric around the front crotch. I need some kind of adjustment there. I think part of my problem was that I did not make a muslin and then decided to shorten the rise by cutting them off at the top/waist area. The length should have come out lower down around my hips. I think it needs more that that though.

Celestial Top and McCalls 7445

I cut a size 6 in this pattern because I was using a very stretchy denim from Joann. McCall's would put me at a size 12. This isn't a very high quality denim, though I do love the color. I consider these a wearable muslin and would really like to perfect the fit and make another version with a higher quality fabric.

Celestial Top and McCalls 7445

I did get a pretty good fit in the back by using the center sew line, which I think would equate to a slight low butt adjustment. My only dislike about the construction of these pants was that there is no fly guard. It isn't fun when you zip up your tender belly! Maybe I made a mistake but mine ended up without one. This was my first time doing a zipper fly but I think these need more reinforcement. I really enjoyed how well made the button fly is on the Lander Pants.

Celestial Top and McCalls 7445

My Celestial Top was a spur of the moment make. My friend Gretchen has been sewing more and I sent her a link to Pattern Fantastique's website thinking she would dig their patterns. Next thing I knew she was making this top and suggested we sew them together. I dug these two hand dyed linens out of my stash (dyed and gifted by my mom) and proceeded to make my new favorite top.

Celestial Top and McCalls 7445

I changed the construction a bit and cut a full lining for the yoke rather than a facing. I used that to totally enclose the seams inside the upper bodice. I prefer this over the pattern instructions, but otherwise I adore this pattern and will definitely make the maxi version at some point. I will do another post sharing some construction tips for this top soon.

Celestial Top and McCalls 7445

How gorgeous is that fabric? Thanks mom!
My generous mother also surprised me with a new to me Bernina for an early birthday/Christmas gift. It is a dream to sew with and I feel so lucky. I haven't made any buttonholes yet but that is the part I am most excited about. My old 70s Bernina was tricky to get a good buttonhole with.

Celestial Top: Size 8
Alterations: Full yoke lining, enclosing seams around yoke and sleeves. Cropped even more than shortest version.
Love: The design
Dislike: The original construction that leaves lots of exposed seams.

McCall's 7445: Size 6 in stretch denim
Alterations: mistakenly shortened rise from top of waist.
Love: The pockets and the wide legs
Dislike: Lack of a fly guard and the fly construction.

My measurements:
Upper Bust 34"
Full Bust 36"
Waist 27"
Hips 39"

On the pants fitting front I have also been working on a good fit with several muslins of the Persephone pants, yet to be finished. I also just finished my first pattern testing with a pair of trousers that I am very happy with for Ensemble Patterns. After years of being scarred by pants fitting I am finally getting over that fear and am so excited to make all the pants!

Friday, August 24, 2018

Ikat Two Piece

A few years ago Ada Spragg was all about the two piece set. As much as I am influenced by her style, I just didn't get it. Well, I finally get it, and here is my two piece set in ikat. I am always late to the party.
  Ikat two piece

I bought two yards of this cotton ikat from Joann a few years ago. I hoarded it, then earmarked it for this skirt, then took at least another year to make it. When I went to cut out the skirt I decided that it needed a matching top. I shortened the skirt and squeezed an Ogden cami (my second) out of the fabric too.

Ikat two piece

I am a new convert to crop tops and skirts and pants that fit at my natural waist.

Ikat two piece

I think the ogden wears and drapes better for me on my rayon crepe version. But I do still love this one and will wear it with high waisted bottoms. Or perhaps over a slip dress.

Ikat two piece

Ikat two piece

I decided not to go too crazy with the topstitching this time but did do a little on those awesome pockets just to highlight them.

Ikat two piece

Ikat two piece

Ikat two piece

The skirt is a vintage Mail Order Pattern that I bought off etsy years ago. It fit perfectly with no alterations. I don't know much about these mail order patterns but have always been drawn to them. I think they were big in the 50s and 60s. I chose view A because even though my machine and I hate making buttonholes, I do love wearing button front clothes. And those pockets are too good to pass up.

Mail order pattern 4615

Speaking of buttonholes, I have a new trick up my sleeve. My mom told me to try a tear away stabilizer. I think these may be the best buttonholes that I have made on my machine. I have a vintage Bernina 831 and the 5 stop button hole maker is broken. It won't go backwards on the 3rd step so I have to start over at step 1 and rearrange the fabric to make the buttonhole correctly.

Button hole sewing tips

I just pin it in place, make the buttonhole right over it and then tear away.

Button hole sewing tips

Button hole sewing tips

How I actually left the house. I think this skirt will go with lots of tops and can be dressed up or down.