Monday, July 15, 2013

Hand Dyed Silk Top

I made this top last year and it is one of my favorite handmade items. My mom and I had an impromptu Indigo dyeing session before they moved away and I used the silk that she gave me for this project.

Handmade top from hand dyed shibori silk
 Top made from hand dyed Shibori Silk Top made from hand dyed Shibori Silk ndmade top from hand dyed shibori silk

Here is a close up of the fabric.
 ndmade top from hand dyed shibori silk

The pattern is McCalls 6205, which was actually intended for knits. I knew there would be a lot of ease in this pattern so I cut an XS, but then ended up adding about 1/2" back in on the side seam right under the arm holes. I also shortened the pattern quite a bit, almost too much in the front though I still love this top.

I'm about to cut this pattern out in a knit, with a neckline variation.  It is definitely a fav now.

I have been toying with the idea lately of dyeing my own fabrics and investing in dyes.  I always relied on my mom for those sorts of projects but she is too far away now.  I have lots of ideas stored away.  Sallie Oh just posted a great tutorial on the basics of dyeing and painting fabrics.  It just may give me the push I need to get started.

Monday, July 8, 2013

Flowers For Karlie

My (almost 4 year old) niece Karlie is a total girlie girl. She loves headbands, having her hair braided and fixed and only wants to wear dresses to school. The funny thing is she is also a little dare devil. I finally got around to making her some headbands and I have more planned. I think these are so freaking adorable!

The top one is made with wool felt and this tutorial.  The bottom one is linen and this tutorial.
image

It took some practice to get the felt flowers right. I may make clips with these little ones. image

Perfect evidence of Karlie's girliness. She had her hair braided in a heart at the salon. image

Tuesday, July 2, 2013

Summery Linen Dress

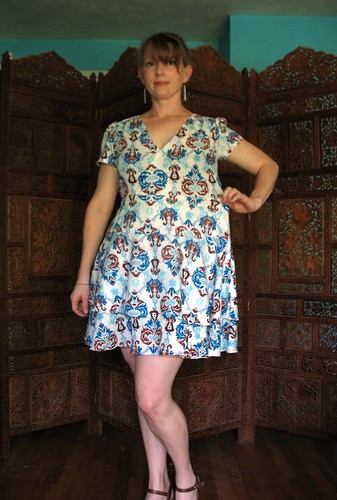
It all started with the fabric. I stalked it on the clearance rack at Joann until they put the clearance fabric another 50% off. I bought a lot, 3 1/2 yards I think, because it was so cheap. I knew I wanted to use a pattern that required a lot of fabric and I wanted a dress. I went with Simplicity 1872, which has three layers of circle skirts and definitely eats up a lot of fabric!

Though that pattern was my base for this dress, it ended up being a highly modified version of the pattern. It has been a month since I made this, and I'm struggling to remember everything that I changed. I am going to have to start taking notes as I sew.

This was definitely one of those make it work projects.  At one point I didn't think it was going to work at all, but I persevered, and I'm so happy with the outcome!
Summery Linen Dress
I started by cutting the skirt for view B. I used a very similar but slightly different bodice from 
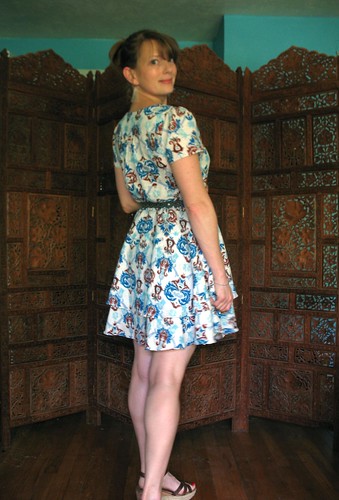
Butterick 5878. I knew the fitting on the Simplicity pattern would be off. There is no closure, or elastic and it simply relies on a tie belt to gather the waist. I knew I wouldn't like that and would want elastic at the waist, which the Butterick pattern was designed with. I also like the sleeves and back yoke of the Butterick better.

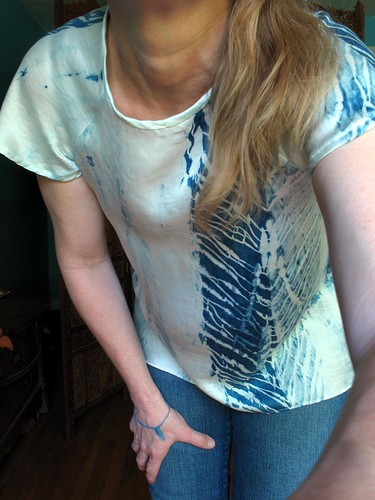
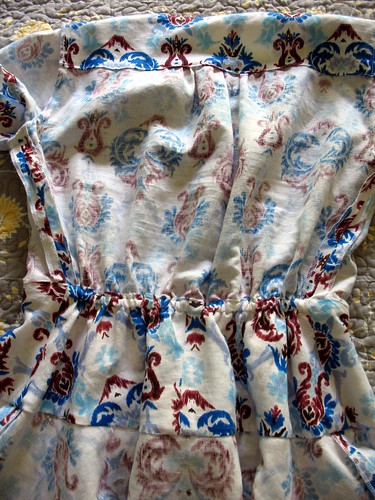
I cut a size 12 in the skirt and a size and a size 6 in the bodice.  I sewed down the wrap in the bodice front and did not gather the sleeves as they were already smallish on me since I cut a smaller size than called for.  The skirt is another story.  I started by adding two inches to each tier because I knew from the finished garment length that it would be too short on me. I also did a tiny rolled hem on the skirt tiers and it is still pretty short for me, just barely long enough!  When I put the skirt and bodice together and was horrified with the fit.  There was just WAY too much fabric and it wasn't flattering.  These pictures are terrible but you can get an idea of what I'm talking about 
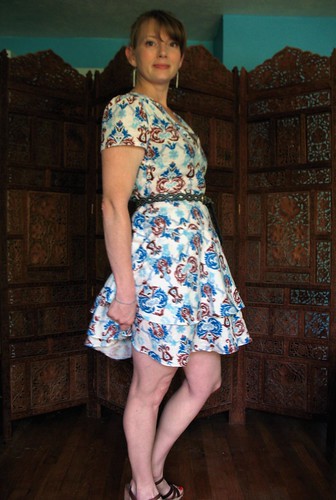
here.  I left off the top layer, which took a lot of fabric off of my hips and waist and made the skirt much more flattering.  So now it is a drop waisted skirt with two tiers of circles, still a lot of fabric but much cuter! 
Summery Linen Dress Summery Linen Dress

The fit was still not flattering however. My solution was to take in as much as I could off of the side seams while still being able to pull the dress over my head. That also meant taking apart the skirt layers and taking each of them in and then putting them back together.  I told you it was a make it work project!  This one required lots of sewing patience, which I don't usually have a great deal of.  I'm so proud of my follow through on this dress. In addition to taking in the skirt, I added elastic at the back waist, which makes the front more fitted and flattering.  I would rather have elastic in the back than front.  Even with these changes the dress looks best belted, in my opinion.

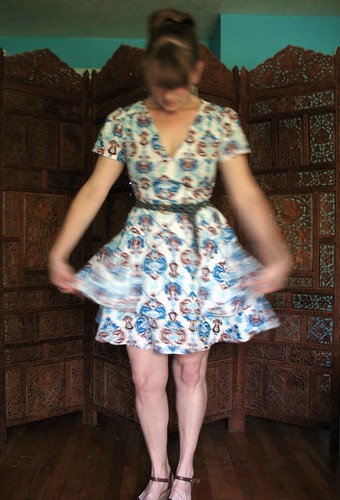
You can see how big it would be without the elastic, this after taking it in considerably and cutting smaller sizes.  This dress could have easily ended up in the scrap pile.  I'm thinking I'm getting better at fitting issues, which is great news.
Summery Linen Dress

I'm really proud of the inside of this garment too. Using a serger to finish raw edges makes such a huge difference.
 Summery Linen Dress

While I love this dress and it is cute and summery, it is dressier than I would wear to the grocery store.  I'm thinking Frank needs to take me out on a date!

I think that the original pattern with the three layers of circle skirts would be lovely in a very light weight fabric, and much more fitted. I'm sure there is a way to insert a zipper in the side of the dress, it would just take some brainstorming. I may someday try again with this pattern, but for now I only need one dress in this style.

I think my garment pictures are getting better little by little and that makes me hate posing for pictures a little less.  I have still been sewing and have a couple more finished pieces to share, along with some projects that I have made for others.  

In other news, we finally joined the gym and are trying to go 4-5 days per week.  I ran outside this morning because we got a cool front and the weather has been too good to not be outside.  After that I went to the gym and tried to get comfortable with the weight machines.  The cardio equipment doesn't intimidate me but the downstairs area with all the muscle guys and the weights does.  I'll get over it soon enough though.

Monday, July 1, 2013

Chocolate+Caramel+Vanilla Bean=Magic

I wanted to make a birthday cake for my friend Susan and her daughter's birthdays. I chose the chocolate cake recipe that I used for Dad's birthday because everyone love it and said it was the moistest cake they had ever eaten. It is an easy cake too, I don't even use my mixer for this one. I topped the cake with a homemade Salted Caramel sauce, which perfectly melded with the cake. I topped it all off with a vanilla bean meringue, which I was afraid would be too sweet. When it was all put together it was a perfect balance of flavors. Everyone loved it and between the seven of us we finished it off.
 Chocolate cake with caramel sauce and Vanilla bean meringue Chocolate cake with caramel sauce and Vanilla bean meringue

Here are the recipes for the Chocolate Cake (I halved the recipe and baked one 9" layer) and Salted Caramel Sauce .  I overcooked the caramel and it came out tasting slightly burnt. It isn't noticeable with the cake but I would not go by the temp on the recipe.  Mine never got that hot and still tasted burnt.  I think you are fine to just cook your sugar till it just starts to turn amber and then add your cream.

Vanilla Bean Meringue
Half of a recipe from Sugar Baby (an awesome book)

5 Egg Whites
1 Cup Sugar
Pinch Salt
1/2 Vanilla bean, seeds scraped from pod
1/2 Tablespoon Vanilla Extract

In the bowl of an electric mixer add egg whites, sugar, salt, vanilla bean seeds and vanilla extract.  Place the bowl over a bain-marie (a simmering saucepan of water). Clip on a  candy thermometer and whisk constantly until the sugar has completely dissolved (I stick two fingers in and rub to see if I feel any granules) and the temperature has reached 160 degrees F.  Immediately transfer the bowl to the mixer and whisk on high until the mixture holds soft peaks and the bowl no longer feels hot to the touch.

At the end of this step you have meringue.  You could go on to make Swiss Buttercream but I stopped here and topped my cake with meringue then toasted it with my torch.  Even though this was a half recipe I had a lot leftover and didn't do anything with it fast enough and it separated.  What a waste of Vanilla Bean!  I should have made Meringue cookies with what was left, or made an even smaller batch.

A coworker asked for some brownies for her birthday, because I had made them for her baby shower. So I made the famous Baked Brownies and topped them with caramel sauce about 2/3 of the way through baking. Another winning combo! My coworkers gobbled them up.